While it is true that some patterns in this game must be manipulated in a very specific way in order to evade them, it also leads to rather exciting fights if you want to conserve bombs. For the fourth boss (which is the hardest one in the game without a doubt), I have this no-bomb strategy:
1. Destroy the left section as soon as possible. You have to dodge the lower turret once, then you sit on top of the part once it only has one turret left. Move a little up and down/left and right to evade in the meantime.
2. Do the same to the right section. It's somewhat harder due to the center part firing as well, it's certainly doable, however.
3. For the actual fight, you want to sit in a specific spot in order to mislead the main spread:
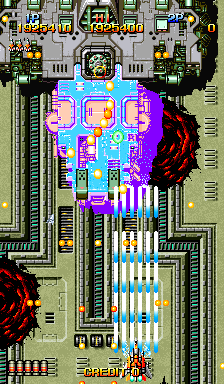
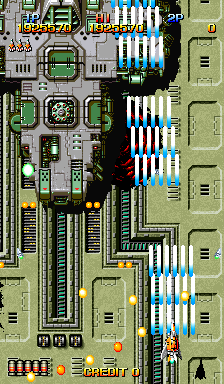
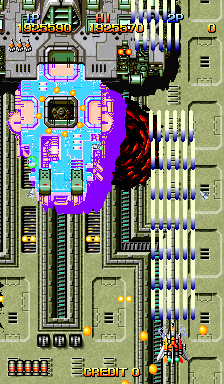
You want to be aligned with the first couple of bullets leftmost/rightmost of the central stream, if you're doing it on the right, you can take the "0" in "Credit 0" as a guidance. The most important part is that you have to be patient - if you try to dodge too early, the nasty spread will be aimed ever so slightly different, leaving you no escape whilst also not allowing you to bomb it in time anymore. If you sit exactly at the bottom or sufficiently near it, there will be a comfortable gap between the two bullets on the far side, giving you enough room to fly through. Afterwards, you want to rinse and repeat. The only issue can stem from the little spread patterns which are mostly harmless yet sometimes block your way. In that case, you will have to do risky improvisations instead.