I bought a Drift Out '94 a few years ago, the picture was washed out and red tinted.
I bought a Vasara 2 many years ago, the picture had a blue tint and was slightly dark.
So, of the four SSV boards I've got, three had poor video. Here's Vasara:


Ignore the wobbly bit on the left of the screen, that's just a fairly common problem with the Toshiba tri-sync screens not liking some low res boards, it's common to hardware type - every JAMMA Taito game I own suffers the same problem. What we can see is the image (and I had turned the brightness up a touch) is dim, and the colours are horribly washed out.
Luckily, this can be fixed fairly cheaply. Setas video chip (ST0004) outputs to some transistors (C1674), and the output from those is smoothed out by some 1k resistors and filter caps. The problem here are the transistors keep failing - now sometimes I'd blame a bad batch of parts if I saw a board with multiple bad components of the same type, but I've now seen this across three boards and two motherboard revisions, so it seems fairly safe to say that Seta are driving them in a manner that leads to their premature death. There's a transistor for sync, and three for R/G/B. Any of these can and will fail, although you may not notice when the sync one dies as the signal will still be within spec for most monitors.
To fix this you will require: small wire cutters, four C1674 transistors (best to do them all regardless), and a soldering iron capable of delivering 410 degrees on a pointed bit. If you don't have an iron capable of this, send the board to someone who does. The middle pin on the transistors needs a LOT of heat before it will shift, since this goes through the 5v plane inside the PCB which acts as a heatsink. If you don't melt the solder properly when removing the old part, there's a high chance of causing physical damage.
So up we go to the test rig.... Quickly looking at the board, the three RAM squared in green are the colour RAM, we're going to remove these to demonstrate the diagnosis - the end result of doing so, is the game will run fine, but will display a solid white screen.

You can see the dim output here. If you have just one or two failed transistors, the screen will be tinted the relevant colour, for example my Vasara 2 board was showing blue because red and green were faulty. The above was Vasara 1 which was dim all over because *all of them* had failed.

We can also see on a scope how things should look, and how they will look during failure. When the transistors fail, they start to pull the output down. You can check them with a scope by probing the side connected to the ST0004.

Here's an example of how the blue should look, followed by how it actually looked on the scope.


And here's how the sync should look, followed by how it probably looks.


Poor old Vasara was showing bad on all four of them... Since the fault seems to be very common, and since we want the best possible uniformity of colour, the best thing to do is replace all four even if a couple are showing as good. Trying to desolder these properly is going to be futile, believe me I tried. The best thing you can do with them, is cut the two outer legs before you even start.

Now turn the board over, turn the iron up to 410 degrees or so, and add some solder to that middle pin. Keep the iron on there and gently try to wobble the transistor from below. Eventually you should see the leg at the bottom starting to move, once it's free, pull the transistor out. This is why we didn't cut the middle leg, it gives us the transistor to hold onto and removes pliers as a source of heatsinking.
When they're out, you can turn the iron back down a bit. Remove the remaining legs and then clean out the solder holes. Solder wick will not cut this, I had to use a desolder station with the desolder iron at 405 degrees...

Fit the new transistors, the outer legs will go in quite nicely, the middle one may not flow from the bottom through to the top properly - honestly I wouldn't worry too much about that, as long as the connection to the 5v plane is made you're fine, and it'll make it easier to fix next time (and it appears there will be a next time). Let's do the white screen test again, you can see (despite me catching it during a blank period) that the white is much brighter, and has caused the camera to adjust exposure as a result.

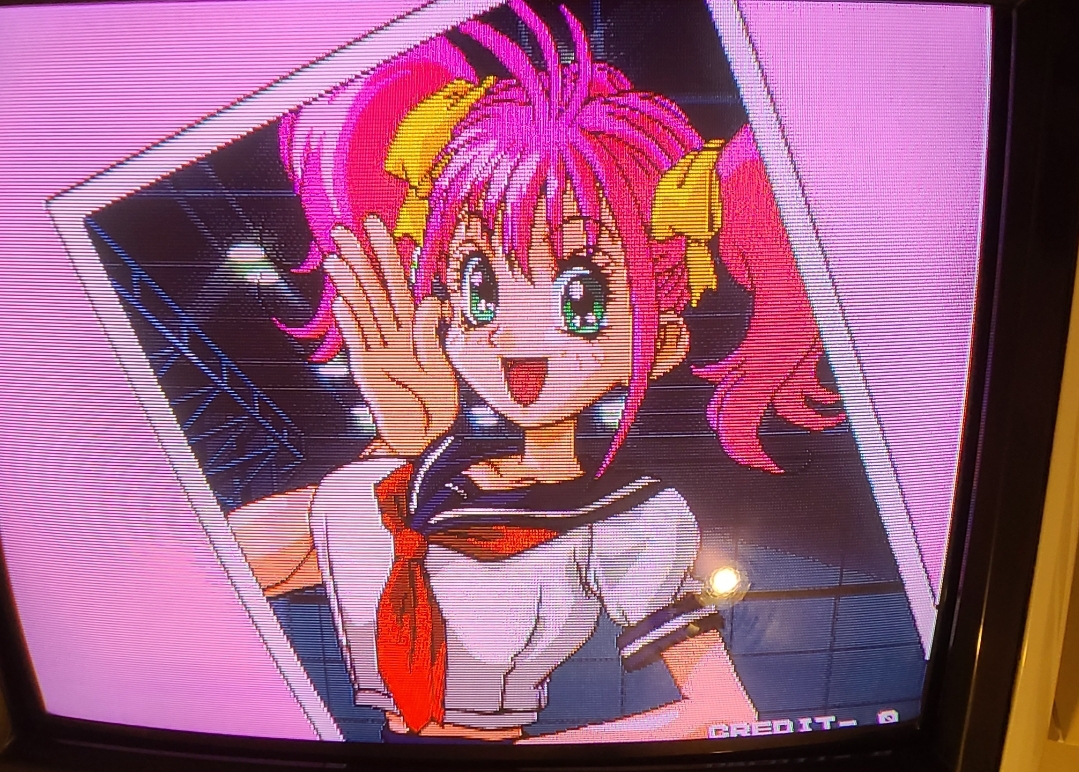
Put the video RAM back in, and it's time to test the game properly, so I took it back down to the New Net City and the Toshiba shown in the first two pictures.


As you can see, there's a vast improvement in both brightness and colour.
So there you go, I imagine there are a lot of people out there who just think these games should be darker. They shouldn't, they need fixing.