ProjectAKo wrote:I keep checking this thread hoping for a Da 2-ALL

Shepardus wrote:Sounds like you're ready to 2-ALL the arcade version!

Shepardus wrote:Parodius Da! 2-ALL plz
Alright, folks, I'll bite. Don't get your hopes up just yet, it's definitely going to be a longer project and I might give up entirely, but for some inexplicable reason I'm rather interested now. Unlike the Detana 2-ALL which is simply impossible and some other stuff that aggravates me to no end (Argus! Also the Special Stage in Gokujou Parodius, unfortunately

), this is for the most parts pretty interesting, although insanely hard. I hope Mero doesn't mind when I'm expounding a bit here on my thoughts, I'd rather have it here for all eternity instead of disseminating it somewhere in the general chat where it will inevitably become marshy in two days. I've worked myself through the second loop via savestates, here's my general plan of action/point of departure:
The Premise
- While I really like the Octopus who is about as good as TwinBee for the first loop, there's no way around the latter for the second loop if you want to approach it as efficiently as possible. This has to do with the rocket punch, the reliability of your shots and the shield.
The rocket punch is not terribly important in the first loop since you're usually not in a rush to take out beefier enemies. However, with all the suicide bullets (see next point), you want to make quick work out of everything that can fill the screen with even more foes. The biggest damage output from the Octopus stems from its missiles, meaning that you have to get uncomfortably close in order to position the options before you can hit your target. TwinBee can just destroy those threats from afar, and quicker.
In a similar manner, being able to shoot at an angle without having to position your options prior can come in handy in trickier sections (especially stage 3). TwinBee can take out turrets and other pests en passant or with economical movement, a luxury that the Octopus does not have. You can't control as much space as easily, that's a comparatively minor disadvantage, though.
TwinBee's shield will make some sections a lot easier than they otherwise would be. The biggest advantage is that you're essentially invincible for a second or so after activating it, even when you're in the midst of a bullet storm. You can even fly through terrain or other dangerous objects such as the spikes of that godawful porcupine fish. You also don't have to wait for it to come to you, it materializes immediately. Octopus' shield is much more resilient and has clearly the upper edge in some cases, the versatility of TwinBee's force field nonetheless wins out in the end as far as I'm concerned.
- There are three factors that make the second loop such a ridiculous challenge: added enemy belligerence, suicide bullets, boss behaviour.
The first one is fairly self-explanatory. Turret enemies of all sorts will simply shoot non-stop and you have to mislead them so that you can take them out somewhat safely. Flying enemies will always shoot at you several times before they leave the screen, including one last time before they go off-screen, a few of them can even fire after leaving the screen (such as the cupido pigs in stage 4). Taking everything out as soon as possible is logically a high priority, but there are also the...
...suicide bullets to watch out for. Regular enemies will usually retaliate with one suicide bullet right away and another delayed one. The latter is the real danger since it is so easy to forget about a deceased enemy under the relentless pressure. You can't suppress these bullets as far as I can tell, it is possible to get point-blanked if you're not careful.
Most bosses work fundamentally the same, albeit much harder, some absolutely require bells, though, they are completely impossible without them - and I mean that literally. This means you have to craft a route during the entire first loop around that (see more under "The Challenges").
The Stages or Changes in the Second Loop
- 2-1: not too bad if you can arrive with one capsule in reserve. "Not too bad" in this context means "still harder than 98% of what you could be playing instead", but it's not nearly as bad as what you will face later. The boss is the biggest threat in the stage since his accompanying penguins fire so much. You probably want to activate two speed-ups in this stage already, although it might be possible with just one.
- 2-2: still quite feasible. You have to be mindful of the penguins that appear during the dancer section, the delayed suicide bullets can surprise an unaware player. Likewise, the boss can be a real jerk, you can manipulate it into doing what you want most of them time, however.
- 2-3: this is where the game becomes extremely hard. If you don't use TwinBee you're going to find that the goblets and their constant supply of pests/suicide bullets will murder you in a snap, the rocket punch will be invaluable here. It also helps that you can kill the penguins blocking the pillars much more easily with the three-way than with any other method. The final stretch before the boss and the boss itself require two bells at the right time, everything else is completely unrealistic. This has consequences for the entire run prior to this section (see more under "The Challenges").
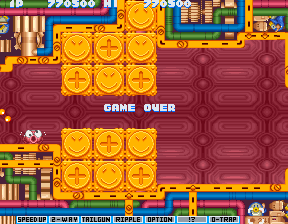
- 2-4: the hardest stage in the game, it's insane. You have to deal with a ton of suicide bullets while being restricted by ample terrain, making it incredibly difficult to evade all of it. You also probably will have activated a third speed-up by now (it doesn't matter difficulty-wise anymore) which is rather problematic in this stage. You need to be constantly on the move and have to exert some incredibly risky stunts in order to destroy some enemy hatches that will otherwise murder you, requiring some perfectly planned shield activations manoeuvres and stunning improvisational dodging. You also need yet another perfectly timed bell for the boss...
- 2-5: There aren't too many changes in this stage compared to others, but those few can make a huge difference. The trickiest part in the actual stage is the section when you're underneath the giant moai ship, before it comes down. You have to take out the hatches while dodging the suicide bullets of the incoming moai ships while also fending off the regular enemies that will spawn from the hatches. You can probably devise a good route for that, I think. The boss requires three speed-ups, dodging the, uh,
missiles with two is impossible. It's also necessary to hit these prior to moving upwards/downwards as the three-way alone is sometimes not enough to take the first one out. You will have to squeeze between the last two missiles which is quite tight.
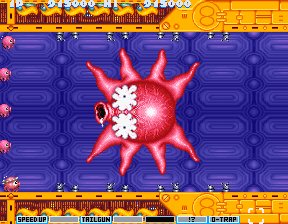
- 2-6: another insanely brutal stage. Just like 2-4, you have to manage tons of suicide bullets in a confined area, and you also have to worry about roulette capsules everywhere. You could theoretically use bells throughout the entire stage, but that would require inhumane precision and calmness amidst the storm of projectiles. You're most likely better off learning where the roulette capsules are so that you can activate shields at the right moment. The pachinko core is surprisingly tricky, its simple pattern ain't so simple with delayed suicide bullets on top of everything else. You could time this guy out, but then you have no slowdown at all, making it a hazardous enterprise.
- 2-7: the stage is fairly similar to the first loop version, all things considered. Quite a bit harder, but not fundamentally different. You have to properly herd the scions of the boss on the other hand, and you need to have the utmost prudence when she dies because all on-screen enemies will immediately turn into suicide bullets and the slowdown subsides, too. A shield in stock is highly recommended for that sort of farewell.
- 2-8: also quite similar to its first loop equivalent. It's still a very rough stage, but it pales compared to 2-3, 2-4 and 2-6. Ideally you want to have a shield in stock for the opening gambit of the porcupine fish, it's possible without one, fortunately.
- 2-9: definitely the easiest stage in the second half of the loop, it's about as demanding as 2-1 or 2-2.
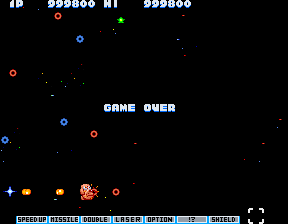
- 2-10: you'd think this would fall into a similar category, yet it assuredly does not. The delayed suicide bullets from the ducker penguins are deadly for they can completely mess up your routing, not quite sure how to reliably counter that yet. The final boss is still strong.
The Challenges
- As I've alluded to earlier, there are a couple of instances where you
need either a green or a red bell. While the maze section in stage 3 is theoretically possible without a bell, the third and fourth boss are not. This is a promise. For maximum scoring purposes, a red bell is ideal, for survival, a green bell. The problem is that in order to get a bell at the right moment, you need to be at the right point in the power-up cycle. If you kill enemies that drop power-ups in a slightly "wrong" order, you might kill the two chickens before the fourth boss and only receive regular capsules. In other words: you have to keep track of the exact amount of capsule-dropping enemies you kill from 1-1 all the way to the 2-4 boss or you're working towards a game over.
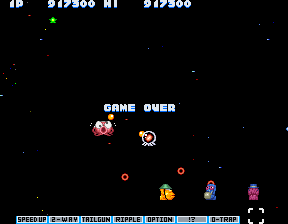
- Dying in loop 2 is obviously a game over in any case. Best just sacrifice all but one on the final boss. This can also be used to manipulate the power-up order, I found some decent routes without activating any capsules.
- No amount of practice will prepare you against delayed suicide bullets, you have to be able to dodge them on the spot.
- 2-4 in particular is so unbelievably hard it's almost funny. Especially since you have to juggle the right bell colour in a matter of mere seconds, once the boss starts to drop enemies from the ceiling you're dead.
- It's not nearly as pronounced as it is in Gradius III AC, but sudden abatements in the slowdown department can also happen here, namely during the aforementioned 2-6 boss fight. Don't stop firing to catch an irrelevant bell unless you know exactly what is coming at you, it's a guaranteed death sentence otherwise.
Conclusion
- This would be the
apt title for anyone daring enough to tackle the second loop.


