
When I first picked up Radiant Silvergun, I was surprised at the scarcity of information on the game. RSG is a game full of unique and obscure mechanics that can make or break the player's experience, yet there's very little in the way of guidance in game or elsewhere. The following in-depth guide explains how the game works, and also provides a (relatively) easy route to 1CC the game.

1. Getting Started
How Do I Get the Game?
An enhanced port is available on Steam and Switch with updated graphics and nice quality-of-life features, like weapon experience bars and a Chain indicator. It also has an online leaderboard and useful training options.
As far as emulation goes, the game was originally released for the ST-V arcade system, which is basically the Saturn. For emulation, I would suggest playing the Saturn home release on a dedicated Saturn emulator like Mednafen; MAME's ST-V emulation tends to be glitchy and unstable.
As far as emulation goes, the game was originally released for the ST-V arcade system, which is basically the Saturn. For emulation, I would suggest playing the Saturn home release on a dedicated Saturn emulator like Mednafen; MAME's ST-V emulation tends to be glitchy and unstable.
Modes
In all of the home releases of the game, there are two modes, Arcade and Story. These are the stage orders for the different modes:
ARCADE MODE (STAGE 2 ROUTE): 3 > 2 > 5 > 6 > 1
ARCADE MODE (STAGE 4 ROUTE): 3 > 4 > 5 > 6 > 1
STORY MODE: 3 > 2 > 4 > 5 > 6+ > 1
If you're wondering why the game starts on "Stage 3", the story is told out of order, and the stage numbers follow the timeline of the story. Arcade Mode gives you the choice of going to Stage 2 or Stage 4 after the first stage. For beginners, I would recommend the Stage 2 route.
Story Mode combines all of the stages, and also has a significantly longer and more difficult Stage 6. In Story Mode, you can choose to continue with the weapon experience that you got from your last run. You earn extends over time, which will be added to your next run.
Controls
The original arcade game used 3 buttons, A, B, and C. Each button is mapped to a weapon, and each button combination is also a weapon:
A - Vulcan
B - Homing
C - Spread
AB - Homing Plasma
AC - Back Wide
BC - Lock-On
ABC - Radiant Sword/Hyper Sword
In the home ports of the game, you can assign macros for the combination weapons, which is particularly useful for the Homing Plasma and Radiant Sword since you'll need to spam those button combinations quickly.
2. Weapons
Weapons

- Vulcan (A) - Basic forward shot. When you tap fire, you shoot a single bullet. Good for DPS and precision shots. Upgrading the Vulcan adds bullets, making it wider.
- Homing (B) - Two streams of homing green bullets. Low damage, but hard to miss with. Only useful in a few sections. Upgrading the Homing makes the projectiles larger.
- Spread (C) - Two flanking bombs that detonate when you release the fire button, leaving behind a lingering explosion. It does good damage and covers your blind spots nicely. Also good for point blanking. Upgrading the Spread increases the radius of the explosion.
- Homing Plasma (A + B) - Two lightning beams that lock on to enemies and grow in power the longer they remain on target. It's a useful weapon for targeting down boss parts. Also goes through walls. If it latches onto something you don't want it to, you can get it to re-target by simply moving left or right. Upgrading the Homing Plasma increases its sweeping range.
- Back Wide (A + C) - Vulcan that fires one bullet forward and several bullets back. Self-explanatory. Upgrading the Back Wide adds bullets to the back shot, making it wider.
- Lock-On Spread (B + C) - 360 degree lock-on lasers. Goes through walls. Does good damage and is particularly strong against bosses with multiple parts. It's the only weapon that can reveal Merry Dogs. Upgrading the Lock-On increases its lock-on radius.
- Radiant Sword (A + B + C) - Swings a sword 360 degrees around your ship that retracts as soon as you let go. If you hold it, it stays deployed, trailing behind you as you move. The primary use of the Radiant Sword is destroying round bullets to build up Hyper Sword energy.
The Hyper Sword is your bomb; on max energy, using the Radiant Sword will instead deploy a high damage, invincible attack. You have no collision while using the Hyper Sword, so you can pass through walls and other obstacles. It does more damage if you're positioned on top of the enemy.
Weapon EXP
You have 3 EXP bars corresponding to each of the 3 primary weapons. Damaging enemies will give you EXP proportional to the amount of Score generated. Therefore, the fastest way to increase your weapon EXP is via high Chain Bonuses. Destruction Bonuses also grant Weapon EXP.
When using a combination weapon, EXP is distributed among the shot types. For example, using the Plasma will gain experience for A and B, distributed equally between the two, and using the Radiant Sword will distribute experience between A, B, and C. Weapon levels increase damage and may also grant weapons additional properties like increased range or extra bullets.
3. Score
Chaining
Chain Bonus
The majority of your score will come from Chain Bonuses. When you kill 3 enemies of the same color, you receive a Chain Bonus equal to the value of the enemies killed. Chain Bonuses increase exponentially the longer the chain (the math behind it is a deep rabbit hole, so don't waste your time like I did). The Chain Bonus resets as soon as you kill an enemy of a different color.
In practice, this means you should choose one enemy color, usually Red, and avoid killing enemies of the other two colors. Unless you're playing on Ikaruga mode, you cannot switch colors and maintain your chain. Red has the most enemies, followed by Blue, then Yellow. The Chain Bonus resets after the Destruction Report of every boss.
Secret Chain
This is where you might get confused if you watch a scoring replay. If you kill a Red, a Blue, and a Yellow consecutively, you will activate a Secret Chain. Secret Chains start off at 10,000 and increase by 10,000 for every 3 Yellow enemies you destroy. Secret Chains are a nice way of getting a lot of points from very few enemies. Whenever you see a section with a glut of Yellow enemies, experiment with Secret Chains to see if it's better than a regular chain.

Other Score
Destruction Bonus
Each boss has multiple parts. The more parts you destroy before killing the boss, the higher your destruction bonus. The Destruction Bonus also gives you weapon experience, so it's a good idea to learn how to get 100% destruction on the early bosses, even though doing so will make them harder. All bosses have a hidden timer; if you take too long to kill a boss, it can escape.
Weapon Bonus
You get a flat Weapon Bonus of 10,000 for fulfilling certain criteria with a weapon.
There are a bunch of hidden Dogs throughout the game that you can unconver using the Lock-On weapon. The best thing to do is just to watch a replay and memorize where they are. Some Merry Dogs will only appear if you got a prior dog.
Tick Points
Shooting enemies will give you 10 points per damage instance. The best weapon for milking Tick points is the Homing Plasma, since you can keep it on low damage by tapping the fire button.
Grazing
You get points for being near bullets, lasers, enemies, or even walls.
Each boss has multiple parts. The more parts you destroy before killing the boss, the higher your destruction bonus. The Destruction Bonus also gives you weapon experience, so it's a good idea to learn how to get 100% destruction on the early bosses, even though doing so will make them harder. All bosses have a hidden timer; if you take too long to kill a boss, it can escape.
Weapon Bonus
You get a flat Weapon Bonus of 10,000 for fulfilling certain criteria with a weapon.
- Vulcan, Homing, Spread, Wide Back - Hit enemies with a certain number of shots. Resets when you miss too many shots.
- Plasma - Target an enemy for a certain amount of time (you can let go of the fire button in between). Resets on target switch.
- Lock-On - Target enemies for a certain amount of time, divided by the number of targets (you can let go of fire in between). Resets on weapon switch.
- Radiant Sword - Hit for a certain amount of time. Resets on weapon switch.
There are a bunch of hidden Dogs throughout the game that you can unconver using the Lock-On weapon. The best thing to do is just to watch a replay and memorize where they are. Some Merry Dogs will only appear if you got a prior dog.
Tick Points
Shooting enemies will give you 10 points per damage instance. The best weapon for milking Tick points is the Homing Plasma, since you can keep it on low damage by tapping the fire button.
Grazing
You get points for being near bullets, lasers, enemies, or even walls.
4. Routing
General Routing Tips
General Routing Tips
- The game is a memorizer! Not only do you have to memorize the locations of enemies and obstacles, you also have to memorize the scoring chains and multitude of boss fights.
- Do not neglect chaining, especially in the early stages. The game's weapon experience system acts as a sort of reverse Rank system, where failing early leads to the game's later stages becoming unplayable.
- The game is meticulously designed with enemies placed in such a way that chaining is always possible
- Begin by trying Red chains, then experiment with Secret chains if you see a lot of Yellow enemies
- Bosses serve to break up the game into scoring sections, since your Chain Bonus resets after the Destruction Report
- Learn how to get 100% destruction on every boss
- Experiment with different weapons. The game is designed to encourage use of your whole arsenal.
- When you're under no pressure, graze walls/enemies and milk Tick points off of high health enemies using the Homing Plasma
- You earn an extend at 1,000,000 and 5,000,000 in Arcade mode.
- Watch one of the many available replays.
Stage 3
3A
Start with a Secret Chain by killing all of the first wave of Red zako, then 1 Blue zako, then all of the Yellows. Wait till they shoot before you kill them, since you want to build up sword energy.
Put some damage on the heavy Red enemy, but don't destroy it. Kill the Yellow zako that appear, then swing back to the center to finish off the heavy Red enemy and the Red zako (starting a Red chain). Mop up some more pink bullets to get Hyper Sword. Use the Spread and Vulcan to kill the final wave of Red enemies.
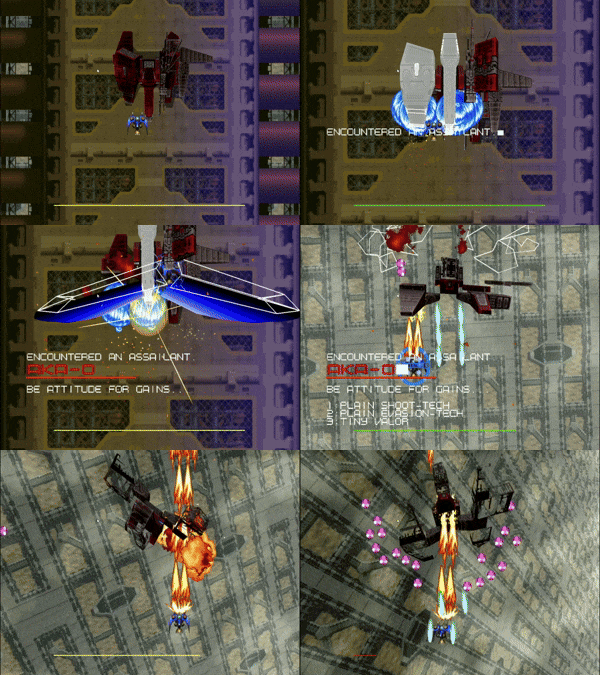
BOSS: AKA-0
You want to clear this boss quickly, since there are two caravan waves of zako that spawn afterwards. Start by point blanking with Spread, then use the Hyper Sword. Gun down any parts that are still intact after the Hyper Sword before destroying the center.
3B
Take the right path and destroy the Red zako with the Vulcan. Use the Spread to destroy the Red turrets on the left, then use the Vulcan to shoot out the three red enemies in the circle. There's a Merry Dog here that we'll ignore.
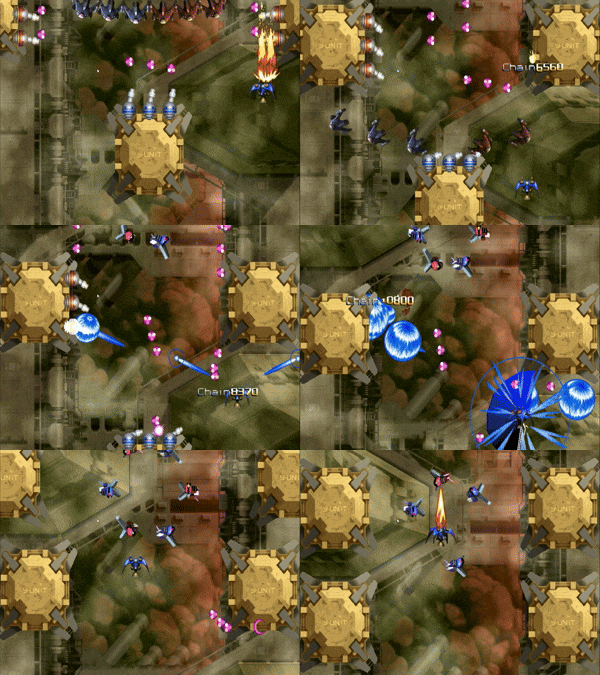
The next few sections are fairly self explanatory, since all of the enemies are Red. When you get past the 3 blue turrets, you want to position your guns so that they hit the far corners of the blocks, and damage the two heavy Red enemies on the sides of the screen.
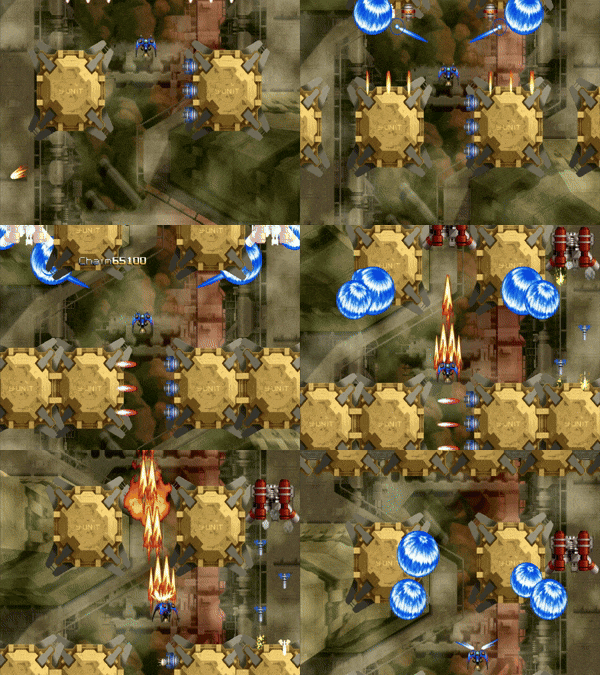
Use your Homing Plasma to shoot through the barriers to clear out some of the Red enemies on the other side. Alternatively, you can Hyper Sword through the blocks if you have the energy. Then finish off the Red enemies and get some quick Secret Chain points by killing a Blue and some Yellows.
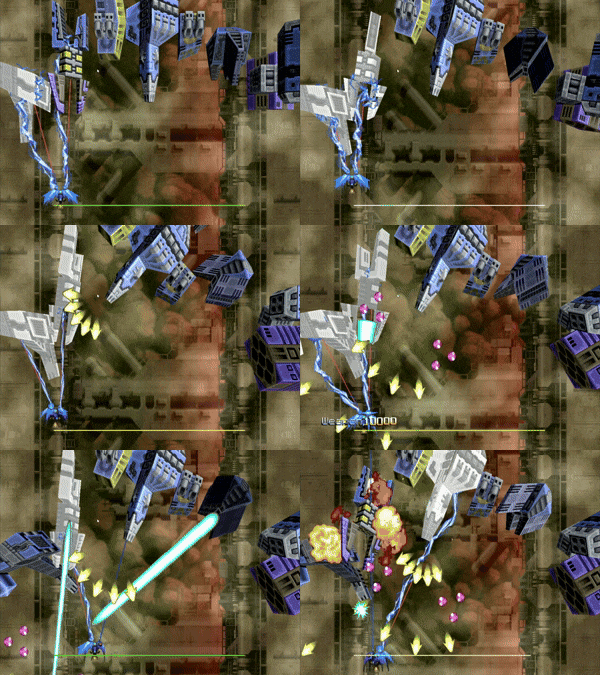
BOSS: MIKA-L
This boss is fairly straightforward. The two outer guns fire small blue star projectiles, the two inner guns fire lasers, and the two attached guns fire pink bullets. Kill the two weapons on the left side first, watching out for the lasers, then shift to the other side. Be careful not to get cornered when the boss fires its main laser cannon. Before you kill the two attached guns, make sure you fill up on Hyper Sword energy for the upcoming section.
3C
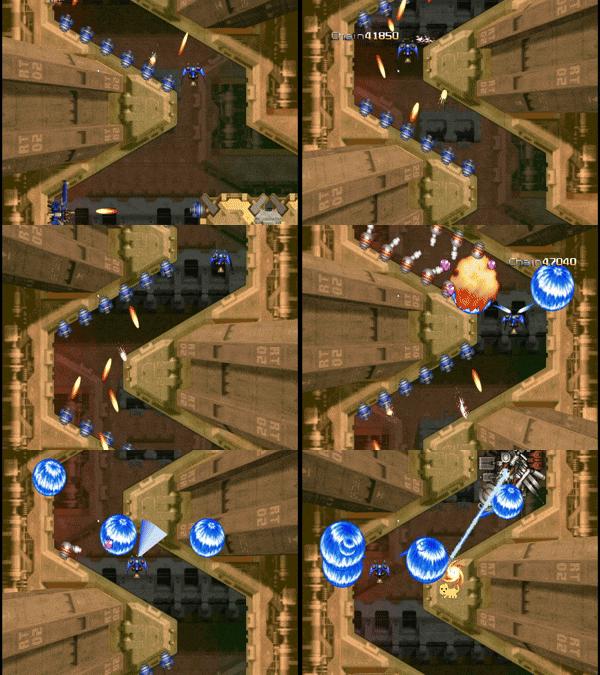
Destroy the three Red enemies with the Spread, and then use the Hyper Sword to kill the giant Red barge. Destroy turrets as you follow the tunnel, and be ready to use the Lock-On to get the Merry Dog on the second turn. You have to do it early enough not to kill the Blue zako, breaking your chain.
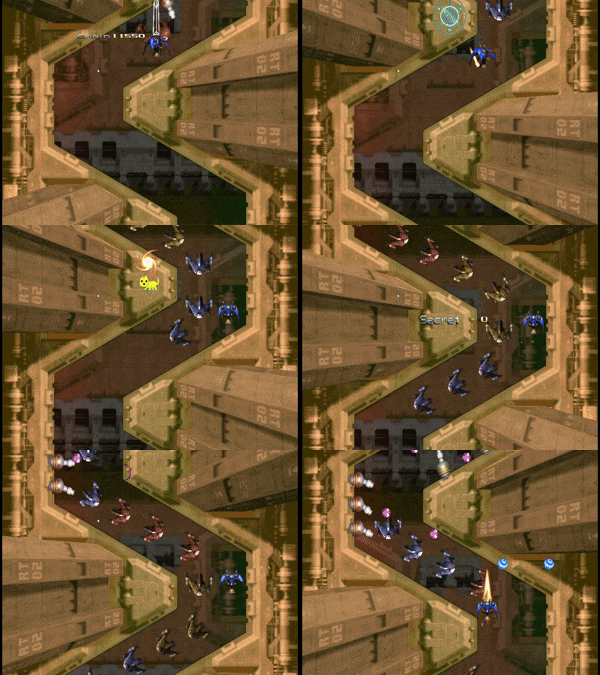
Kill the three Red zako, then sidle past the rest and destroy the three Red turrets with your Spread. To dodge the three Yellow turrets, you want to move between the first two, let them shoot, then move past them. Destroy the Red turrets on the bottom, then use the Homing Plasma to kill the Red turrets on the other side.
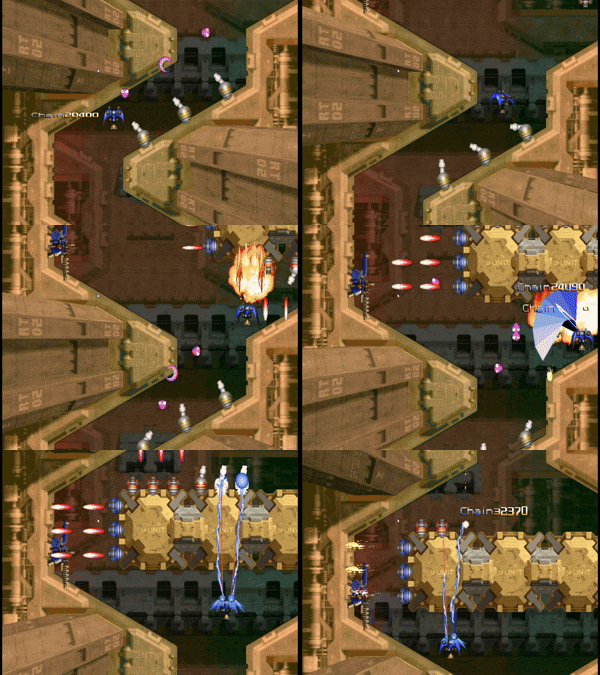
Move along with the Blue turrets' firing pattern. Destroy the three Red turrets on the wall with your Spread, and continue moving. Destroy all of the Red turrets, then get the Merry Dog on the last turn in the tunnel. Use the Spread to kill the big Red enemy (it'll get out of the way if you don't kill it fast enough), and kill the final enemy that comes from behind.
BOSS: GALLOP
This walking R-Type reference comes complete with an indestructible Force attached to the front of the ship, two indestructible Bits to its sides, and five destructible parts.
Use the Homing Plasma to latch onto the guns to the sides of the Force. If you accidentally latch onto the Force or Bits, you can retarget by moving left and right while holding fire. Stay a little ways up the screen so that you can thread the DNA beam. As long as you stay aligned with the boss, nothing will hit you on its first cycle of attacks.
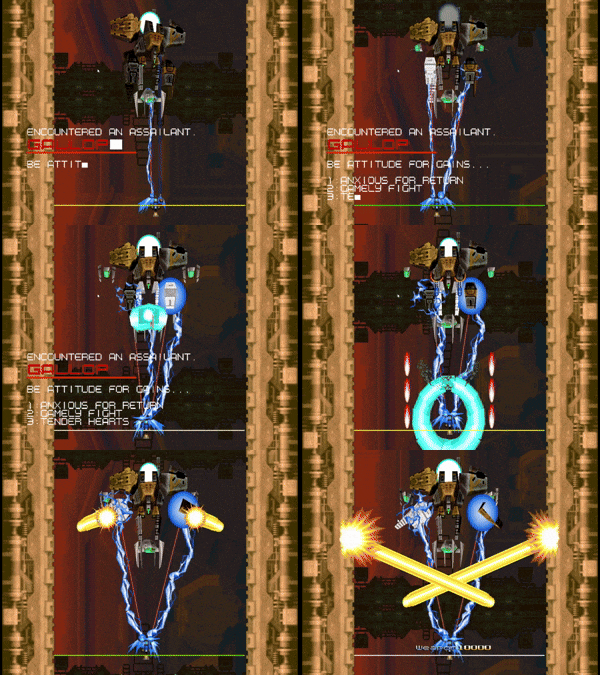
When it starts shooting pink bullets, that means it's about to Charge Shot, so get out of the way. At this point, the two Reflect guns should be destroyed, and the DNA gun attached to the front has probably died as well. Use the Homing Plasma and carefully target the two back parts of the ship (you may only be able to hit one at a time). During the second phase, you don't want to align yourself with the ship; stay to the sides, and you should be able to dodge most of its attacks easily.
3D
In the short section before the next boss, you should Secret Chain by killing the Reds, 1 Blue, the Yellows, the next wave of Yellows, and finally ending on a Red chain. Herd bullets to the sides of the screen when you aren't shooting.
BOSS: UNDO
Use Lock-On at the start to uncover a Merry Dog in the center of the screen.
This boss has a fixed pattern. It alternates between shooting pink bullets/homing lasers and sweeping its big laser cannon. The first big laser cannon blast will start on the left side, the second on the right, and the third in the center. In the first phase, hide behind walls and shoot at the boss parts with Homing Plasma.
The third time it fires the laser cannon, it'll spin 360 degrees several times. Stick close to the boss and follow its spin while using the Lock-On to destroy its parts. Once all parts are destroyed, the boss will continuously spin while firing the big laser cannon. You want to stay behind the boss and repeatedly bait it into switching directions.
3E
Three waves of zako will show up. The Reds will appear from left to right.
Destroy the three Red enemies in the center, then use the Spread to hit the two Red barges on your sides. Pick off the Red enemy in the center with the Vulcan, then continue shooting the barges with the Spread.
Use the Spread to hit Red enemies, kill 1 Blue, then use the backswing of the Hyper Sword to kill all the Yellow enemies.
BOSS: UE2A-GAL
The last boss of Stage 3 is actually pretty easy.
The boss produces a large number of pink bullets, meaning that you can charge your Hyper Sword multiple times throughout, though if you want 100% destruction, try not to do too much collateral damage to the center.
Start with a Secret Chain by killing all of the first wave of Red zako, then 1 Blue zako, then all of the Yellows. Wait till they shoot before you kill them, since you want to build up sword energy.
Put some damage on the heavy Red enemy, but don't destroy it. Kill the Yellow zako that appear, then swing back to the center to finish off the heavy Red enemy and the Red zako (starting a Red chain). Mop up some more pink bullets to get Hyper Sword. Use the Spread and Vulcan to kill the final wave of Red enemies.
BOSS: AKA-0
You want to clear this boss quickly, since there are two caravan waves of zako that spawn afterwards. Start by point blanking with Spread, then use the Hyper Sword. Gun down any parts that are still intact after the Hyper Sword before destroying the center.

3B
Take the right path and destroy the Red zako with the Vulcan. Use the Spread to destroy the Red turrets on the left, then use the Vulcan to shoot out the three red enemies in the circle. There's a Merry Dog here that we'll ignore.

The next few sections are fairly self explanatory, since all of the enemies are Red. When you get past the 3 blue turrets, you want to position your guns so that they hit the far corners of the blocks, and damage the two heavy Red enemies on the sides of the screen.

Use your Homing Plasma to shoot through the barriers to clear out some of the Red enemies on the other side. Alternatively, you can Hyper Sword through the blocks if you have the energy. Then finish off the Red enemies and get some quick Secret Chain points by killing a Blue and some Yellows.
BOSS: MIKA-L
This boss is fairly straightforward. The two outer guns fire small blue star projectiles, the two inner guns fire lasers, and the two attached guns fire pink bullets. Kill the two weapons on the left side first, watching out for the lasers, then shift to the other side. Be careful not to get cornered when the boss fires its main laser cannon. Before you kill the two attached guns, make sure you fill up on Hyper Sword energy for the upcoming section.

3C
Destroy the three Red enemies with the Spread, and then use the Hyper Sword to kill the giant Red barge. Destroy turrets as you follow the tunnel, and be ready to use the Lock-On to get the Merry Dog on the second turn. You have to do it early enough not to kill the Blue zako, breaking your chain.

Kill the three Red zako, then sidle past the rest and destroy the three Red turrets with your Spread. To dodge the three Yellow turrets, you want to move between the first two, let them shoot, then move past them. Destroy the Red turrets on the bottom, then use the Homing Plasma to kill the Red turrets on the other side.

Move along with the Blue turrets' firing pattern. Destroy the three Red turrets on the wall with your Spread, and continue moving. Destroy all of the Red turrets, then get the Merry Dog on the last turn in the tunnel. Use the Spread to kill the big Red enemy (it'll get out of the way if you don't kill it fast enough), and kill the final enemy that comes from behind.

BOSS: GALLOP
This walking R-Type reference comes complete with an indestructible Force attached to the front of the ship, two indestructible Bits to its sides, and five destructible parts.
Use the Homing Plasma to latch onto the guns to the sides of the Force. If you accidentally latch onto the Force or Bits, you can retarget by moving left and right while holding fire. Stay a little ways up the screen so that you can thread the DNA beam. As long as you stay aligned with the boss, nothing will hit you on its first cycle of attacks.

When it starts shooting pink bullets, that means it's about to Charge Shot, so get out of the way. At this point, the two Reflect guns should be destroyed, and the DNA gun attached to the front has probably died as well. Use the Homing Plasma and carefully target the two back parts of the ship (you may only be able to hit one at a time). During the second phase, you don't want to align yourself with the ship; stay to the sides, and you should be able to dodge most of its attacks easily.
3D
In the short section before the next boss, you should Secret Chain by killing the Reds, 1 Blue, the Yellows, the next wave of Yellows, and finally ending on a Red chain. Herd bullets to the sides of the screen when you aren't shooting.
BOSS: UNDO
Use Lock-On at the start to uncover a Merry Dog in the center of the screen.
This boss has a fixed pattern. It alternates between shooting pink bullets/homing lasers and sweeping its big laser cannon. The first big laser cannon blast will start on the left side, the second on the right, and the third in the center. In the first phase, hide behind walls and shoot at the boss parts with Homing Plasma.
The third time it fires the laser cannon, it'll spin 360 degrees several times. Stick close to the boss and follow its spin while using the Lock-On to destroy its parts. Once all parts are destroyed, the boss will continuously spin while firing the big laser cannon. You want to stay behind the boss and repeatedly bait it into switching directions.
3E
Three waves of zako will show up. The Reds will appear from left to right.
Destroy the three Red enemies in the center, then use the Spread to hit the two Red barges on your sides. Pick off the Red enemy in the center with the Vulcan, then continue shooting the barges with the Spread.
Use the Spread to hit Red enemies, kill 1 Blue, then use the backswing of the Hyper Sword to kill all the Yellow enemies.
BOSS: UE2A-GAL
The last boss of Stage 3 is actually pretty easy.
The boss produces a large number of pink bullets, meaning that you can charge your Hyper Sword multiple times throughout, though if you want 100% destruction, try not to do too much collateral damage to the center.