2025/09/10
I deleted the material in the first post(s) of each ST/GD, as threads cannot be deleted once there are replies. The rest of the thread will remain in place, this being a measure of some sort that prevents people from doing something illegal (e.g. posting links to roms and such) and then deleting proof of their heinous crimes. Since I also want to retain control over my own posts, especially when they do not infringe any rules, I have deleted them now in order to avoid that somebody may quote them and keep them online without my consent. Those who are interested in the original post may contact me via PM, and we can arrange ad hoc solutions regarding the OP for this thread.
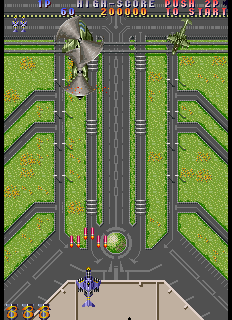
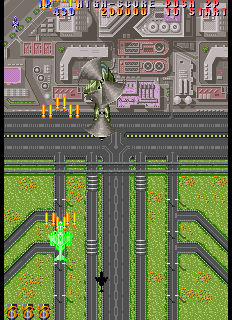
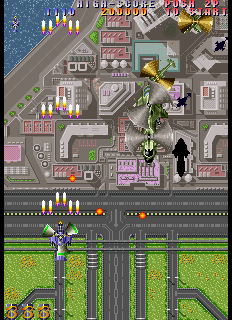
ST: Kyukyoku Tiger II (redux)
-
Randorama
- Posts: 4079
- Joined: Tue Jan 25, 2005 10:25 pm
- Contact:
ST: Kyukyoku Tiger II (redux)
Last edited by Randorama on Wed Sep 10, 2025 3:47 pm, edited 2 times in total.
"The only desire the Culture could not satisfy from within itself was one common to both the descendants of its original human stock and the machines [...]: the urge not to feel useless."
I.M. Banks, "Consider Phlebas" (1988: 43).
I.M. Banks, "Consider Phlebas" (1988: 43).

-
Randorama
- Posts: 4079
- Joined: Tue Jan 25, 2005 10:25 pm
- Contact:
-
Randorama
- Posts: 4079
- Joined: Tue Jan 25, 2005 10:25 pm
- Contact:
-
Neon

- Posts: 3529
- Joined: Tue Jan 25, 2005 10:31 pm
-
Randorama
- Posts: 4079
- Joined: Tue Jan 25, 2005 10:25 pm
- Contact:
Can you investigate if it only happens with the red shot? I usually use only the overclocked autofire on Saturn and the Binchou laser, so i never inquired further 
"The only desire the Culture could not satisfy from within itself was one common to both the descendants of its original human stock and the machines [...]: the urge not to feel useless."
I.M. Banks, "Consider Phlebas" (1988: 43).
I.M. Banks, "Consider Phlebas" (1988: 43).
-
Neon
- Posts: 3529
- Joined: Tue Jan 25, 2005 10:31 pm
There are 3 levels for the blue shot as well, and four (!) after powering up once. Mayhap the same thing happens with the red shot.
Powering up had no effect with the green shot, as far as having to tap the button goes.
Nice to hear the SS conversion has an autofire function, KTII should be infinitely more fun without sore thumbs.
Powering up had no effect with the green shot, as far as having to tap the button goes.
Nice to hear the SS conversion has an autofire function, KTII should be infinitely more fun without sore thumbs.
-
cigsthecat

- Posts: 929
- Joined: Wed Jan 26, 2005 12:35 am
- Location: Burbank, CA
For the stage 4 boss-
After the two parachuting tanks are destroyed, you can move up and just sit on the boss' main turret. You'll need to come back down after a couple of seconds though to dodge the missile attack. Then you get get back on top of it for the final four way bullet turret.
Nice game, it could really benefit from a remake with improved boss designs and added difficulty.
-
SAM

- Posts: 1788
- Joined: Fri Jun 03, 2005 5:27 am
- Location: A tiny nameless island in South China Sea
Yes, that what I found too.Neon wrote:There are 3 levels for the blue shot as well, and four (!) after powering up once. Mayhap the same thing happens with the red shot.
Powering up had no effect with the green shot, as far as having to tap the button goes.
Well, there is no auto fire function for the SS version. Randorama is just using the hardware auto fire on the controler.Neon wrote:Nice to hear the SS conversion has an autofire function, KTII should be infinitely more fun without sore thumbs.
*Meow* I am as serious as a cat could possible be. *Meow*
-
professor ganson

- Posts: 5193
- Joined: Mon Feb 21, 2005 3:59 am
- Location: OHIO
-
Randorama
- Posts: 4079
- Joined: Tue Jan 25, 2005 10:25 pm
- Contact:
I don't want to sound like a tyrant, but no OTs in STs, please.professor ganson wrote:OT:
Would someone who loves Twin Cobra like this game as well, do you think?
Neon, so you can confirm:
red --> three increases in power level by tapping
blue --> four increases in power level by tapping
green --> no increases at all (well, considering that green still needs to be overclocked for efficiency...)
"The only desire the Culture could not satisfy from within itself was one common to both the descendants of its original human stock and the machines [...]: the urge not to feel useless."
I.M. Banks, "Consider Phlebas" (1988: 43).
I.M. Banks, "Consider Phlebas" (1988: 43).
-
Neon
- Posts: 3529
- Joined: Tue Jan 25, 2005 10:31 pm
My mistake. 4 levels by tapping on blue and red on any level of power.
Other minor corrections:
Other minor corrections:
According to this source it would seem the game was developed fully by Takumi. If this guy is to be believed, snow bros II was Toaplan's last release and not Batsugun as you said in that ST (excepting perhaps the Special version, dunno where I can check the exact dates).[/url]The game was going to be the first Toaplan's title on a "next-gen" hardware, but Toaplan bankrupted and the funds were not enough to complete the game.
-
Randorama
- Posts: 4079
- Joined: Tue Jan 25, 2005 10:25 pm
- Contact:
Edited the history part after a few more checks around (including the owner of the seemingly dead toaplan.com). To be exact, Taito commissioned this sequel and Toaplan went belly up when development was starting...in short, a couple of people jumped to Takumi and completed the commission with their help (the designer for sure, and apparently one programmer).
"The only desire the Culture could not satisfy from within itself was one common to both the descendants of its original human stock and the machines [...]: the urge not to feel useless."
I.M. Banks, "Consider Phlebas" (1988: 43).
I.M. Banks, "Consider Phlebas" (1988: 43).
-
Twiddle

- Posts: 5012
- Joined: Sat Feb 18, 2006 11:28 pm
- Contact:
-
zinger

- Posts: 1387
- Joined: Sun Jan 30, 2005 10:58 pm
- Location: Sweden
- Contact:
-
Randorama
- Posts: 4079
- Joined: Tue Jan 25, 2005 10:25 pm
- Contact:
Getting extra points for power-up items is what increases rank, so switching from normal bombs to hypers doesn't affect it.
"The only desire the Culture could not satisfy from within itself was one common to both the descendants of its original human stock and the machines [...]: the urge not to feel useless."
I.M. Banks, "Consider Phlebas" (1988: 43).
I.M. Banks, "Consider Phlebas" (1988: 43).
-
Limbrooke

- Posts: 1893
- Joined: Fri Dec 23, 2005 4:24 am
- Location: Ontario, Canada
- Contact:
I wanted to mention that I believe there is a distinct difficulty difference between Twin Cobra 2 (World/US) and Kyukyoku Tiger 2 (Japan).
While dip and test menu settings are the same between the two on factory settings the strength of enemies or of the weapon is clearly not the same.
I began to look into this when watching LUNardei's 1CC replay which is using Twin Cobra 2. I have the Sega Saturn Kyukyoku Tiger 2 and mainly run in Arcade mode (so TATE). I thought when I first watched the video that enemies and game in general seemed more manageable than what I ever encountered.
This is mostly evident on Stage 2 before the 2x large red aircraft appear. The white medium sized aircraft that initially appears in groups of 3, later appearing one-by-one from either left or right seem to be less of a threat in TC2 versus KT2.

In TC2 using Thunder Claw at full level, the side projectiles make short work of these enemies in the last part before the large red aircraft appear. Barely any problems occur with correct positioning on the left side of the screen to destroy the 3-shot water tanks, without auto-fire no less. The island fort also goes down without any trouble while the speed of the projectiles from the first (leftmost) red aircraft make it no threat and it too can be downed before the second (rightmost) aircraft appears. Today I managed without any effort to no-miss, no-bomb Stage 2 in TC2 for the first time.
Meanwhile in KT2, I couldn't hope to dream to do this. The medium white aircraft are stronger and require a bit higher fire frequency while the water tanks can actually fire off a volley before you can destroy them. The island too is a little stronger while destroying the first red aircraft before #2 appears is also a pipe-dream without auto-fire. The speed and aggressiveness I believe is best exemplified in this section here since it is early although the first boss and the first sub-boss (St1 in canal, versus red aircraft) can be downed much quicker in TC2 than in KT2.
So the biggest difference is how much damage an enemy can take, KT2 specifically requires more damage dealt. Afterwards comes the aggressive nature of the enemies. Max rank between TC2 and KT2 don't feel 100% the same but this is possibly affected by the initial point of enemies being destroyed faster or lasting longer.
TC2 World and US appear to be the same but I haven't spent too long in US to notice much difference.
One other point to address would be that scoring is slightly higher in the Saturn game (TATE/Arcade anyway). It's very marginal but in KT2 MAME the best I've managed on St1 is 499,190 while on Saturn it's around 530,000 after the EOS bonus. I cannot seem to get more than 90,000 after the St1 sub-boss in MAME while on Saturn I am consistent with 100,000+. It's noticeable even earlier on but that's where the score difference is first apparent.
I'd ask if others would at least compare arcade TC2 and KT2 to verify what I speak of here but I'm pretty confident in my findings.
While dip and test menu settings are the same between the two on factory settings the strength of enemies or of the weapon is clearly not the same.
I began to look into this when watching LUNardei's 1CC replay which is using Twin Cobra 2. I have the Sega Saturn Kyukyoku Tiger 2 and mainly run in Arcade mode (so TATE). I thought when I first watched the video that enemies and game in general seemed more manageable than what I ever encountered.
This is mostly evident on Stage 2 before the 2x large red aircraft appear. The white medium sized aircraft that initially appears in groups of 3, later appearing one-by-one from either left or right seem to be less of a threat in TC2 versus KT2.
In TC2 using Thunder Claw at full level, the side projectiles make short work of these enemies in the last part before the large red aircraft appear. Barely any problems occur with correct positioning on the left side of the screen to destroy the 3-shot water tanks, without auto-fire no less. The island fort also goes down without any trouble while the speed of the projectiles from the first (leftmost) red aircraft make it no threat and it too can be downed before the second (rightmost) aircraft appears. Today I managed without any effort to no-miss, no-bomb Stage 2 in TC2 for the first time.
Meanwhile in KT2, I couldn't hope to dream to do this. The medium white aircraft are stronger and require a bit higher fire frequency while the water tanks can actually fire off a volley before you can destroy them. The island too is a little stronger while destroying the first red aircraft before #2 appears is also a pipe-dream without auto-fire. The speed and aggressiveness I believe is best exemplified in this section here since it is early although the first boss and the first sub-boss (St1 in canal, versus red aircraft) can be downed much quicker in TC2 than in KT2.
So the biggest difference is how much damage an enemy can take, KT2 specifically requires more damage dealt. Afterwards comes the aggressive nature of the enemies. Max rank between TC2 and KT2 don't feel 100% the same but this is possibly affected by the initial point of enemies being destroyed faster or lasting longer.
TC2 World and US appear to be the same but I haven't spent too long in US to notice much difference.
One other point to address would be that scoring is slightly higher in the Saturn game (TATE/Arcade anyway). It's very marginal but in KT2 MAME the best I've managed on St1 is 499,190 while on Saturn it's around 530,000 after the EOS bonus. I cannot seem to get more than 90,000 after the St1 sub-boss in MAME while on Saturn I am consistent with 100,000+. It's noticeable even earlier on but that's where the score difference is first apparent.
I'd ask if others would at least compare arcade TC2 and KT2 to verify what I speak of here but I'm pretty confident in my findings.
'Only a fool trusts his life to a weapon.'
-
Ruldra

- Posts: 4222
- Joined: Wed Mar 05, 2008 1:27 am
- Location: Brazil
I played both versions for a few minutes, and yeah, the japanese version seems to be a bit harder. The ships Limbrooke mentioned are firing faster and more often, and enemies are taking longer to kill too. I always manage to kill the first big tank in stage 3 before the second one appears in the world version, but in the japanese one the second one appears before I'm done with the first.
I wish I knew about this earlier
I wish I knew about this earlier
-
Limbrooke
- Posts: 1893
- Joined: Fri Dec 23, 2005 4:24 am
- Location: Ontario, Canada
- Contact:
I've resolved why the scoring in Kyukyoku Tiger 2 Plus (Sega Saturn) is higher than the original arcade game.
In the arcade a player is awarded 500pts for picking up a 'like' or current weapon power-up. This does not change until Level 5 where 10,000pts are awarded, and each level after sees an increase of 10,000 more until 100,000pts are acheived from pick-up of a power-up while at max power.
In Saturn, a player is awarded a whooping 10,500pts for the 1st like power-up. The next level sees 20,500pts awarded and the max level gives 30,500pts. However, after Level 4 is reached the normal 10,000pts rolling max bonus picks up from the arcade game.
These rules apply even when switching weapons, so it relies simply on what level is being reached, meaning there is no way to avoid these 'like' weapon bonuses.
Edit: As I just discovered, the crazy part about this point glitch for 'like' weapon bonus is that it affects the blue ship (P1) only. P2/red ship is unaffected and has the normal 500pts bonus for picking up the next level of a current weapon. I wonder how Naxat messed this up.
Player 1, Arcade mode, KT2+, SSF

Player 2, Arcade mode, KT2+, SSF

In the arcade a player is awarded 500pts for picking up a 'like' or current weapon power-up. This does not change until Level 5 where 10,000pts are awarded, and each level after sees an increase of 10,000 more until 100,000pts are acheived from pick-up of a power-up while at max power.
In Saturn, a player is awarded a whooping 10,500pts for the 1st like power-up. The next level sees 20,500pts awarded and the max level gives 30,500pts. However, after Level 4 is reached the normal 10,000pts rolling max bonus picks up from the arcade game.
These rules apply even when switching weapons, so it relies simply on what level is being reached, meaning there is no way to avoid these 'like' weapon bonuses.
Code: Select all
Saturn    Player1                                      Arcade      Player1
Level 1     *                                          Level 1       *
L2        10,500                                       L2          500pts
L3        20,500                                       L3          500pts
L4        30,500                                       L4          500pts
L5!       10,000                                       L5!         10,000pts
          20,000                                                   20,000pts
          30,000                                                   30,000pts
(continues at 10k increases until...)
LMax 100,000 (each power-up thereafter is 100k) LMax 100,000pts (each power-up thereafter is 100k)Player 1, Arcade mode, KT2+, SSF
Player 2, Arcade mode, KT2+, SSF
Last edited by Limbrooke on Wed Apr 30, 2014 12:20 am, edited 1 time in total.
'Only a fool trusts his life to a weapon.'
-
lgb
- Posts: 2179
- Joined: Thu Oct 18, 2007 2:12 pm
Re: ST: Kyukyoku Tiger II (redux)
Can I get all possible options and the default options for the Saturn game?
-
TransatlanticFoe

- Posts: 1993
- Joined: Mon Jan 24, 2011 11:06 pm
- Location: UK
Re: ST: Kyukyoku Tiger II (redux)
Resurrecting this old one...
In the Saturn version, the options menu has "power up" and a choice between A, B or C. What does this actually do? I changed it but didn't notice any difference.
This guide is awesome btw. The stage 3 boss was owning me until I read about the safe spot!
In the Saturn version, the options menu has "power up" and a choice between A, B or C. What does this actually do? I changed it but didn't notice any difference.
This guide is awesome btw. The stage 3 boss was owning me until I read about the safe spot!
-
Limbrooke
- Posts: 1893
- Joined: Fri Dec 23, 2005 4:24 am
- Location: Ontario, Canada
- Contact:
Re: ST: Kyukyoku Tiger II (redux)
Here's the transcribed description from the manual.TransatlanticFoe wrote:Resurrecting this old one...
In the Saturn version, the options menu has "power up" and a choice between A, B or C. What does this actually do? I changed it but didn't notice any difference.
Obviously, it's not much help if you don't read Japanese. However A is definitely default meaning business as usual and power ups behave normally.A-業務用と同仕様。
B-最初から最強POWER UP。POWER UP ITEM を取得すると、ITEMの 変更と得点が入ります。PLAYER機がやられた場合も、POWER DOWNません。
C-基本的には、業務用と同仕様。PLAYER機がやられた時、1段階のPOWER DOWNしかしません。
It seems to talk about powering down but I'm not clear on what it means, even after some trial and error I too didn't notice much difference. Perhaps someone can effectively translate it.
'Only a fool trusts his life to a weapon.'
-
TransatlanticFoe
- Posts: 1993
- Joined: Mon Jan 24, 2011 11:06 pm
- Location: UK
Re: ST: Kyukyoku Tiger II (redux)
Cheers - having it posted means I can at least run it through translators online and get something (I tried to get free translator apps to take a picture of the manual but they were useless). Google translate seems to suggest that it's to do with scoring off power ups - since you get bonus points per item once you're fully powered up, that would make sense.
If anyone can muster a proper translation that'd be grand please. Maybe it's not talking about points but is talking about rank?
If anyone can muster a proper translation that'd be grand please. Maybe it's not talking about points but is talking about rank?
-
Randorama
- Posts: 4079
- Joined: Tue Jan 25, 2005 10:25 pm
- Contact:
Re: ST: Kyukyoku Tiger II (redux)
Thank you for the recent posts, it is nice to see that this game, and its ST, can still get some love.
I would like to clean up the original post once we have a translation of the options menu. Since we are here, anyone would like to discuss problematic parts, tricks, aspects of the game that are still not clear, etc.?
I would like to clean up the original post once we have a translation of the options menu. Since we are here, anyone would like to discuss problematic parts, tricks, aspects of the game that are still not clear, etc.?
"The only desire the Culture could not satisfy from within itself was one common to both the descendants of its original human stock and the machines [...]: the urge not to feel useless."
I.M. Banks, "Consider Phlebas" (1988: 43).
I.M. Banks, "Consider Phlebas" (1988: 43).
-
pc945
- Posts: 10
- Joined: Thu Nov 03, 2011 3:10 pm
Re: ST: Kyukyoku Tiger II (redux)
Here's the transcribed description from the manual.TransatlanticFoe wrote:Resurrecting this old one...
In the Saturn version, the options menu has "power up" and a choice between A, B or C. What does this actually do? I changed it but didn't notice any difference.
A-業務用と同仕様。
B-最初から最強POWER UP。POWER UP ITEM を取得すると、ITEMの 変更と得点が入ります。PLAYER機がやられた場合も、POWER DOWNません。
C-基本的には、業務用と同仕様。PLAYER機がやられた時、1段階のPOWER DOWNしかしません。
A means: Just like the arcade version(You start from weapon level 1, and when you are shot down, your weapon resets to level one).
B means: You start the game with max weapon level. The power-up items means just changing weapons or boost your score. When you are shot down, your weapon does not reset.
C means: Initially like the arcade version, but when you are shot down, your weapon will be just downgraded by one level rather than reset to level one.(Example: If I get shot down with green level 4, the next one will be green level "3", not green level 1 when you are using setting A.)
-
TransatlanticFoe
- Posts: 1993
- Joined: Mon Jan 24, 2011 11:06 pm
- Location: UK
Re: ST: Kyukyoku Tiger II (redux)
Awesome, thanks very much 
-
gabrielesquaratti
- Posts: 40
- Joined: Mon Jun 10, 2013 8:27 pm
Re: ST: Kyukyoku Tiger II (redux)
the fact that you must tap like crazy to crave out some decent firepower from red and blue simply (almost) ruined gameplay
too bad.i've bought it today
too bad.i've bought it today
-
Randorama
- Posts: 4079
- Joined: Tue Jan 25, 2005 10:25 pm
- Contact:
Re: ST: Kyukyoku Tiger II (redux)
I will delete this ST on the 2025/09/30. Anyone who is willing the incorporate information from this ST in future STs is welcome to do so before that date. The STG wiki page for the game represents a simply superior source, but some readers might want to preserve parts of this now obsolete ST for their own personal reasons. Readers who wish to complain about this decision can read Sistem11's message in the DonPachi ST from 10 years ago for some background.
"The only desire the Culture could not satisfy from within itself was one common to both the descendants of its original human stock and the machines [...]: the urge not to feel useless."
I.M. Banks, "Consider Phlebas" (1988: 43).
I.M. Banks, "Consider Phlebas" (1988: 43).
-
CStarFlare

- Posts: 3069
- Joined: Tue Feb 19, 2008 4:41 am