Spongebob TV SB314 Mod Update
It isn't working. I got impatient (a major character flaw of mine) and placed the resistors from
Syntax's diagram on the board and hooked everything up, and it's not working. Whenever I disconnect the 5v blanking wire, I can see the original channel select/source blue screen, but there isn't an OSD. I don't think anything is broken, but it's clear to me that I am not using the correct resistor/diode values, and I think I need some more help (more information about this post) if anybody can offer it.
Sharp 13KM100
I just picked this 13 inch crt from a coworker, and I'm actually more hopeful that I can get this one modded with your help. Page 15 of
this service manual pretty much shows everything I need to know, I think. I have located the jungle and osd chips on the board I removed from the TV, but I feel like I'm at square one.
I want to RGB mod this thing, and I don't really care if it's the non-OSD mux/toggle switch method.
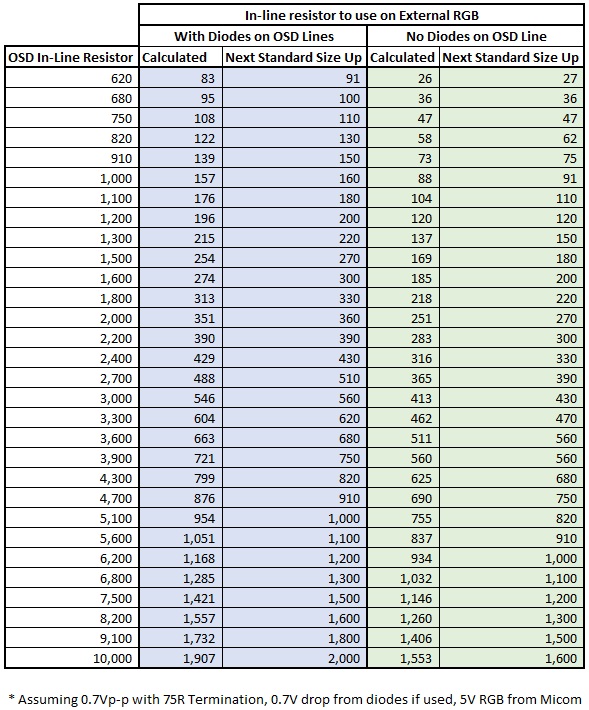
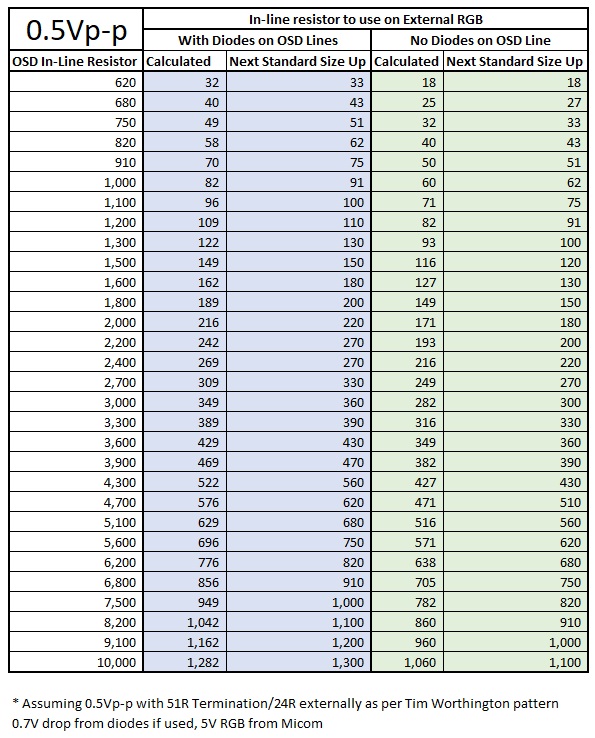
If I'm looking at the inline resistor values correctly on the source chip (6,800), should I go ahead and order some 1,100 resistors according to
this table?
The resistors to ground right before the jungle are 1.8k. Would these be swapped with 75ohm?
Source
 Jungle

Thank you for any help. I'm really excited to get these two up and running. Such a neat project.


