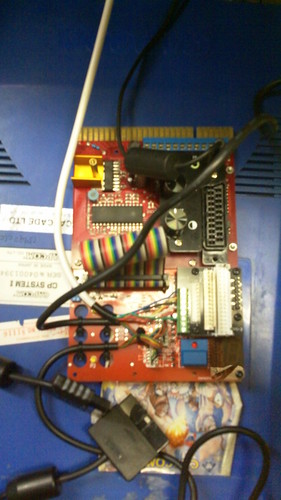
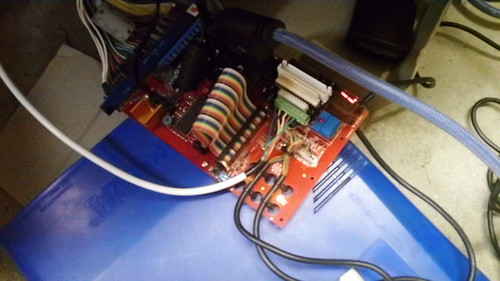
The interface is manipulated entirely with SW1, the blue keyswitch. There are also some indicators:
Yellow player 1 LED -- P1 Light
Yellow player 2 LED -- P2 Light
Red seven segment display -- Display
Red SW1 LED (on the blue keyswitch) -- SW1 Light
The SW1 Light will come on when SW1 is depressed and go out when released. When in programming mode the SW1 Light will remain on until you have gone through the programming procedure.
The memory is blank to start with. You will need to set up at least one profile before the device is useful. The Display will show "_" which is the new profile indicator. Because there is nothing to do in normal mode at this stage, I will begin with a description of programming mode.
Programming Mode
Hold down SW1 for six seconds or more and release. The SW1 Light will stay on to let you know you're in programming mode.
At this moment P1 Light and P2 Light will both be off.
The Display will alternate between "I" and "II" every second. Press SW1 at the right time set Dual Shock or Dual Shock 2 emulation. In theory there should be no difference between the two, but the option is there to ensure compatibility
The next step is to set up all the inputs. A function will show on the display, you then assert any input(s) you want to associate with that function. If you do not want to use this function, press SW1 to skip to the next function. If you want to associate multiple inputs to the same function then assert them together. When it detects that there are no longer any inputs asserted it will skip to the next function.
At this point the P1 Light will come on.
01. "0" Player 1 d-pad up
02. "1" Player 1 d-pad down
03. "2" Player 1 d-pad left
04. "3" Player 1 d-pad right
05. "4" Player 1 start
06. "5" Player 1 select
07. "6" Player 1 triangle
08. "7" Player 1 circle
09. "8" Player 1 X
10. "9" Player 1 square
11. "A" Player 1 L1
12. "b" Player 1 L2
13. "c" Player 1 L3
14. "d" Player 1 R1
15. "E" Player 1 R2
16. "F" Player 1 R3
17. "G" Player 1 left-analog up
18. "H" Player 1 left-analog down
19. "I" Player 1 left-analog left
20. "J" Player 1 left-analog right
21. "K" Player 1 right-analog up
22. "L" Player 1 right-analog down
23. "M" Player 1 right-analog left
24. "n" Player 1 right-analog right
25. "o" Player 1 analog button
26. "p" Player 1 select + start combination
27. "q" Player 1 select + L3 combination
The P1 Light will go out and the P2 Light will come on.
28. "0" Player 2 d-pad up
29. "1" Player 2 d-pad down
30. "2" Player 2 d-pad left
31. "3" Player 2 d-pad right
32. "4" Player 2 start
33. "5" Player 2 select
34. "6" Player 2 triangle
35. "7" Player 2 circle
36. "8" Player 2 X
37. "9" Player 2 square
38. "A" Player 2 L1
39. "b" Player 2 L2
40. "c" Player 2 L3
41. "d" Player 2 R1
42. "E" Player 2 R2
43. "F" Player 2 R3
44. "G" Player 2 left-analog up
45. "H" Player 2 left-analog down
46. "I" Player 2 left-analog left
47. "J" Player 2 left-analog right
48. "K" Player 2 right-analog up
49. "L" Player 2 right-analog down
50. "M" Player 2 right-analog left
51. "n" Player 2 right-analog right
52. "o" Player 2 analog button
53. "p" Player 2 select + start combination
54. "q" Player 2 select + L3 combination
Now both the P1 Light and P2 Light will be on.
55. "/" Select next profile
Note that for 'Select next profile' function to be useful, it should be associated with the same input in every profile.
56. "=" Rapid fire
The rapid fire function works a bit differently to the others. Once you are up to this stage, simply assert any input that you wish have the rapid-fire ability. You can assert them one at a time or together, it doesn't matter. Once you are finished, press SW1. If you press SW1 without asserting any inputs, none of them will have rapid-fire.
This is the last step in the programming procedure. The profile will now be saved to internal memory and you will now be sent back to normal mode. The memory can hold up to 16 different profiles (0,1,2,3,4,5,6,7,8,9,0,A,b,c,d,E,F).
Normal Mode
The P1 & P2 Lights serve the same function as the Analog light on a Dual Shock controller. The current profile can be selected by pressing SW1 or asserting an input associated with the 'Select next profile' function (if it has been set up correctly). To create a new profile press SW1 until the Display shows "_" and hold SW1 for at least six seconds to enter programming mode. If you would like to overwrite an existing profile then hold SW1 while the profile you would like to overwrite is selected. If you would like to delete a profile, hold SW1 while the profile is selected and enter programming mode. While in programming mode press SW1 over and over to skip every function. This will effectively delete the profile.
SW3 adjusts the rapid fire rate.
Example
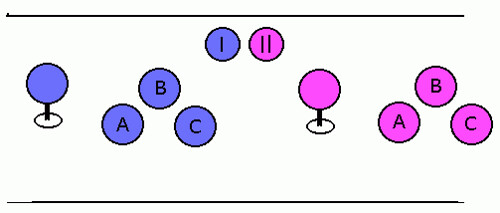
If you had a control panel with the layout above and wanted to program it like so:
Blue joystick - P1 D-pad
Blue A button - P1 square
Blue B button - P1 triangle
Blue C button - P1 X
Pink Joystick - P2 Left analog stick
Pink A button - P2 square
Pink B button - P2 triangle
Pink C button - P2 triangle rapid fire
Blue I button - P1 start
Pink II button - P1 select
You would enter programming mode, select either Dual Shock or Dual Shock 2 mode, then enter the data like so:
At this point the P1 Light will come on.
01. "0" Move blue joystick to up position
02. "1" Move blue joystick to down position
03. "2" Move blue joystick to left position
04. "3" Move blue joystick to right position
05. "4" Press blue I button
06. "5" Press pink II button
07. "6" Press blue B button
08. "7" Press SW1
09. "8" Press blue C button
10. "9" Press blue A button
11. "A" Press SW1
12. "b" Press SW1
13. "c" Press SW1
14. "d" Press SW1
15. "E" Press SW1
16. "F" Press SW1
17. "G" Press SW1
18. "H" Press SW1
19. "I" Press SW1
20. "J" Press SW1
21. "K" Press SW1
22. "L" Press SW1
23. "M" Press SW1
24. "n" Press SW1
25. "o" Press SW1
26. "p" Press SW1
27. "q" Press SW1
The P1 Light will go out and the P2 Light will come on.
28. "0" Press SW1
29. "1" Press SW1
30. "2" Press SW1
31. "3" Press SW1
32. "4" Press SW1
33. "5" Press SW1
34. "6" Press pink B button and keep it held down, then press pink C button, release them together.
35. "7" Press SW1
36. "8" Press SW1
37. "9" Press pink A button
38. "A" Press SW1
39. "b" Press SW1
40. "c" Press SW1
41. "d" Press SW1
42. "E" Press SW1
43. "F" Press SW1
44. "G" Move pink joystick to up position
45. "H" Move pink joystick to down position
46. "I" Move pink joystick to left position
47. "J" Move pink joystick to right position
48. "K" Press SW1
49. "L" Press SW1
50. "M" Press SW1
51. "n" Press SW1
52. "o" Press SW1
53. "p" Press SW1
54. "q" Press SW1
Now both the P1 Light and P2 Light will be on.
55. "/" Press SW1
56. "=" Press pink C button (and release), then press SW1
done


 | My games -


