ST: Harmful Park

For posting and requesting strategic gameplay tips on shmups!
Post Reply
User avatar
CStarFlare
Posts: 3000
Joined: Tue Feb 19, 2008 4:41 am

ST: Harmful Park

Post by CStarFlare »

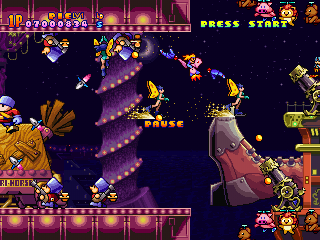
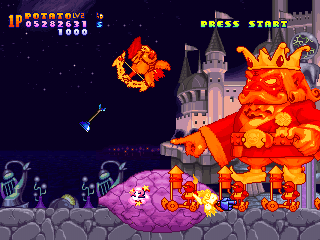
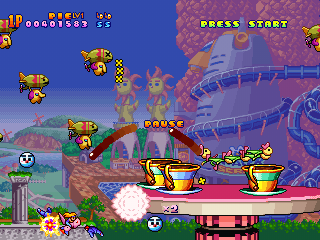
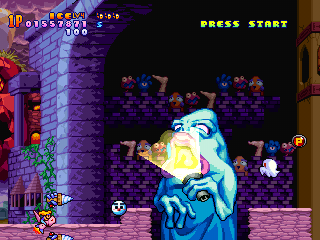
Harmful Park is a horizontal shooter exclusive to the PlayStation, brought to us by Sky Think Systems. If that name doesn't ring a bell, it's because Sky Think never hit it big, only releasing three games in the mid-90's before calling it quits. Their other releases were the puzzle series Kururin Pa, whose snowman mascot appears in Harmful Park as a bonus token.

Harmful Park is probably best known for being mega expensive. It's also widely regarded as very easy - due party to the fact that the game defaults to Easy Mode. What many people don't seem to recognize is the impressive depth the game's scoring systems provide; proper weapon choice, careful timing, and resource management all pay off in major ways.

Fortunately for the cash-strapped, PlayStation emulation is more than up to the task of running Harmful Park properly. Harmful Park is no more out of your reach than Dodonpachi is, and is equally deserving of a chance to win your heart.

Weapons
Harmful Park equips the player with four different weapons, each with its own unique special "bomb" attack. Each handles differently, and the easiest weapon to use in any given situation will likely not be the right weapon to use to rack up points.

Potato
The most traditional weapon in your arsenal, it's a basic vulcan-type gun. Reliable and easy to use, it's great if you're feeling overwhelmed and want to deal damage without having to worry about the peculiarities of the other weapons. However, the shot has very poor scoring potential; you'll struggle to get a x2 with it.

Potato's special attack is smartbomb attack with a small twist. A giant sweet potato will appear around your character and and linger for a second before exploding. Enemies that touch the potato will take damage; when it explodes it will damage everything on the screen. More on this later.

Ice
The Ice shot shoots a long dairylicious laser at the enemies. There are breaks in the beam which takes getting used to but it deals great damage, penetrates enemies, and is the easiest weapon to chain with.

It does get harder to chain when you level up the weapon: each individual beam establishes its own combo, so you need to do some careful positioning to maximize your chain. It's difficult to combo into big enemies, but Ice is a great way to weaken them so they can be finished off with a bomb.

Ice's special attack is a large laser that shoots out of a giant ice cream sundae. It's powerful but has poor combo potential. Best for bosses if you're not feeling brave.

Pie
The Pie weapon lobs a creamy grenade at your targets. Pies are best thrown at short range, they travel in an arc and are difficult to aim from a distance and the longer your pies are in the air the longer you have to wait to throw more.

Pies are the second most important scoring tool in your arsenal. They're not great for general use, but a solid hit does consistent damage every time and it's the most consistent way I've found to deal specific amounts of damage before throwing a bomb out. Staying at Lvl. 1 is an easy way to make sure you're able to accurately accurately gauge your damage output.

A less useful feature of the Pie weapon is that your multiplier builds faster - from 2x to 4x, etc. Even more interesting, it might possible to keep your chain from pie to pie. Unfortunately, there are very few cases where enemies are grouped in a way that allows you to take advantage of this - the birds in stage 2 are a rare exception.

The special Pie attack is really a special cake attack that fires a rotating barrage of cakes around your character. It's the strongest attack in the game, but you have sit on top of an enemy actually hit them with all the cakes - and if you're still there when the attack ends and your invincibility runs out, oops.

Jerry
The Jerry attack throws homing blobs of jelly at enemies. They're weak and difficult to aim at specific targets and are basically never the best weapon for a situation. Even worse, the projectiles often remain on screen for quite a while searching out a target, and you can't fire Ice or Pie while there's still one on screen.

The Jerry special surrounds your characters in a big ol' bowl of jello that absorbs a lot of damage (and deals a small amount to any enemy that touches you), but there's no way to dispel the shield and you're stuck with the Jerry weapon until it's gone. It's probably very helpful if you want to survive certain hairy situations without burning through your entire Special stock, but if you're going for something other than a clear than the opportunity cost of using it is probably too high.

Scoring
There are several sources of points in Harmful Park:

Multiplier
The multiplier will be your main source of points in Harmful Park. The default is x1, obviously; each enemy after the first that is killed with the same projectile will increase your multiplier by 1, up to x16. This multiplier is applied to the defeated enemy's base value, which is displayed in the upper left hand corner when they are killed. That base is an important factor - an enemy worth 500 killed with a x16 chain is worthless compared to an enemy worth 5,000 killed with a x3 chain. As a general rule, we want to identify enemies with large base values, and find a way to kill them with a very high multiplier. The multiplier also influences gem drops, as discussed below.

The Ice weapon is good for building basic multipliers against small groups of weak enemies you encounter throughout the stages. They are generally not worth much, but why not take what you can get?

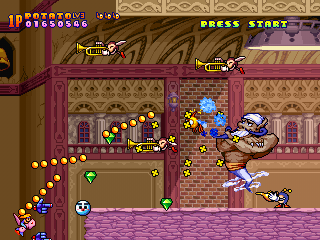
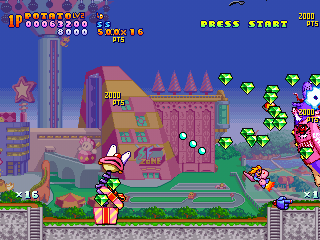
The multiplier really shines when you're able to apply it to large enemies. As an example, there is an enemy midway through stage 1 that will explode popcorn (?) all over the screen. He's worth 5,000 - but before he leaves the screen, over a dozen flying hats will join him. If you weaken him enough so that a Potato bomb will kill him when it explodes, the hats will bump your multiplier up to x16 which is applied to the stronger enemy upon its demise for a value of 80,000 points. Note that this works on bosses, who have a base value of 50,000!

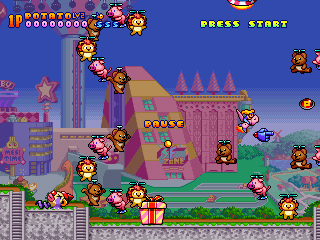
If you can find a reasonably sized swarm of weak enemies, you can still pull in a respectable amount of points by letting them flood the screen, bombing, then collecting the gems they drop (well over a dozen in many circumstances). In some cases it might be prudent to have a second bomb on standby, so that you can safely catch all the gems.
ImageImage

Remember - if you're playing the game right, extends are plentiful and bombs are cheap, so don't be afraid to throw away a life to restock. (Just make sure you set your weapon to Pie or Jerry beforehand) As part of my level walkthroughs I'll be pointing some of these valuable spots out, with strategies for taking advantage of them.

Gems
Gems are dropped by enemies; some drops are fixed while others will drop them occasionally. Gem values increase by 500 with each gem collected and reset to 500 when a single gem is dropped; the change in value happens regardless of whether or not there are other gems on screen. Dropping a full-value gem costs you 22,500 while you rebuild the value.

Attaining higher multipliers increases the drop rate - at a certain level you will are more or less guaranteed a gem from every enemy killed (probably x14 or higher).

*SPECULATION**
My theory is that the game accumulates the multiplier values you get, and spawns a gem when that accumulated value reaches a certain point.

For example, assume a gem spawns at an accumulated value of 18. When you hit or exceed 18 a gem spawns, the accumulated value is reduced by 18, and the cycle begins again:

Say you build a x4, then a x3, then a x5:

Code: Select all

x1  1
x2  3
x3  6
x4  10
x1  11
x2  13
x3  16
x1  17
x2  19 GEM
     1
x3  4
x4  8
x1  9
x2  11
x3  14
x4  18 GEM
     0
x5  5
This would explain why gems spawn more frequently the better your chaining is, and at a certain point the leftover accumulated value plus your next multiplier addition will (almost?) always push you over the threshold and spawn another gem.

((End speculation))

You also spawn gems when you die, I believe based on the weapon level you lose. Losing a lvl. 4 will spawn 3, lvl. 3 will spawn 2, lvl. 2 will spawn 1, and lvl. 1 gets you nothing. Since you get 5,000 points for collecting a powerup while at Lvl. 4, it's better to just grab the powerup for points than to level up unused weapons to spawn gems when you die.

Gem collection also influences when non-fixed powerups will spawn. I'm not sure of specifics, but more gems=more powerups.

Snowmen
Snowmen are worth 50,000 points each, and are hidden in every level. When you shoot their hiding place they will appear for a brief second; once you've done enough damage to them they will turn white and can be collected.

I'll provide locations of all the Snowmen in a later post.

End-Stage Bonus
There are three factors that contribute to your stage bonus:
Specials in stock x 5,000
Gems collected x 100
50,000 x Destroy % if >100%
200,000 if 100% enemies destroyed
100% destruction is often very difficult - it's not as simple as "shoot everything;" I've only got 100% on stage 1. Input from others would be very welcome on this.

In short, the bulk of your score will probably come from bombing large groups of weak enemies, ideally with a high-value stronger enemy destroyed at the end. You are awarded with an extend every 500k; it is possible to earn an extend with a single well timed bomb. There is no clear bonus I can see (maybe in Score Attack?), so suiciding to replenish your bomb stock is an essential tactic.
Restart Syndrome::
Shmup leaderboards and Video Index! | My score history on RS
User avatar
CStarFlare
Posts: 3000
Joined: Tue Feb 19, 2008 4:41 am

Re: ST: Harmful Park

Post by CStarFlare »

Stage Strategies
Stage 1: Open Field
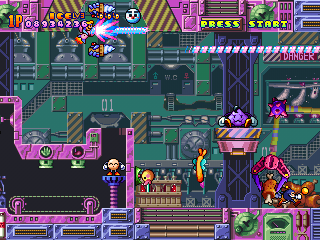
A nice simple stage, with a surprising amount of scoring opportunities. There are a few enemies that give decent bonuses.

Tank/Rider 2,000 each
The tank ride at the beginning and its rider (who pops out after you destroy the machine) are both worth 2,000. I suggest weakening the tank with three lvl. 1 pies, then use your Ice beam to kill it with a decent multiplier for 10,000k. If you don't accidentally kill the rider at the same time, he'll run forward and pose between two statues. Let the yellow flyers fill the screen for a while, then bomb at the last second to kill everything and hit a ~12x multiplier on the posing rider (24,000, plus the other enemies and the gems that drop).

Panda 2,000
Pandas need to be weakened just a little bit before a Potato bomb will kill them. They're not always worth it, but if you can get a decent multiplier, why not?

Gumball machine 10,000
It's a little difficult to pull off, but if you can bring this thing close to death and bomb when the swarm of small enemies is just coming on screen, you can get a really good multiplier on the Gumball machine's 10,000.

Popcorn Ship 5,000
This shows up just after the crying swing ride. If you let him live long enough, he'll swell up and explode destructible popcorn across the screen. His projectiles don't give points, but he's worth a bundle if you know how to handle him.

Hit him with two full Lvl. 4 Ice beams, and bomb when the swarm of hats has built up for a x16. It's worth bombing again soon after, to collect the gems and take advantage of the popcorns that keep coming.

Carriers (x2) 5,000 each
Near the end of the stage, two ships appear that will launch enemies in to big bowl below. They're worth 5,000 each, and the enemies they toss out help establish a decent multiplier.

BOSS Balloon Dinosaur
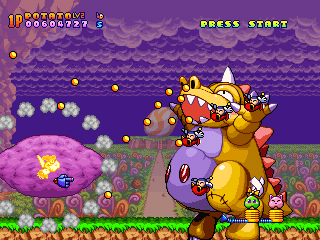
The first boss has the lowest scoring potential of all of them, but it's very easy to score on. Hit the boss with 13 pies while he's standing still, and add a bit of Potato fire. At the end of his attack pattern four small enemies will fly out; if you can kill them and the boss with one bomb you'll walk away with 250,000 points. If he doesn't die on the first bomb, the boss will repeat his patterns several times and more enemies will fly out.

Image

Stage 2: Horror House
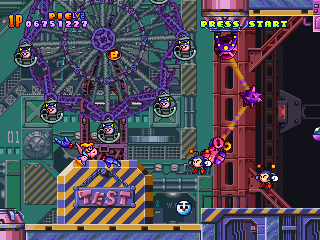
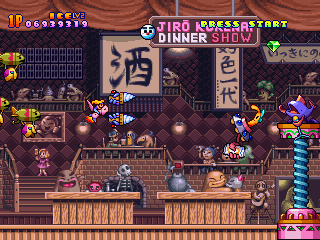
Stage 2 has some of the game's neatest set pieces - the doomed wedding and demon jaws are instantly memorable. Sadly it falls a bit short in the scoring department, with few high-value enemies accompanied by weaker popcorn enemies to build a multiplier with.

Large Ghosts 5,000
Three of these pop up in the early section of stage 2; the last two are worth trying to score on. Right before they appear, there will be a power up item - switch to the Pie weapon and grab it. Hit each ghost with three Lvl. 2 Pies, and bomb the smaller ghosts around them.

Hooded Magician 5,000
Three of these appear in the middle of the stage; one will spawn near a group of weak enemies. Weaken the magician, then toss a bomb right before she goes off stage.

Invincible Ghosts 2,000 each
Right before the midboss, you'll fly through a corridor with stained six glass windows and a demon jaw floating before you. Two invincible ghosts will break through each window and follow you, keep them in a pack until the fourth window. When the ghosts break through the fourth window fly through the jaws, drawing your pursuers into them just as they clamp down. Only 8 ghosts will follow you at a time; at the fifth window they will start flying away. If draw 8 of them in at once, you'll get almost 200,00 points.

Heart Midboss 10,000
Situate yourself right above the crying man, and start throwing Lvl. 1 Pies at the Heart. When it starts flashing red switch to the Potato weapon, back up a bit, and throw out a bomb every time the screen fills up with small hearts. You'll have time for three bombs before the midboss runs away; you can hit the max multiplier on the small hearts (and spawn plenty of gems) with the midboss falling on the third.

If you're not comfortable throwing out that many bombs, try to do a little extra damage up front and kill the midboss with your first bomb.

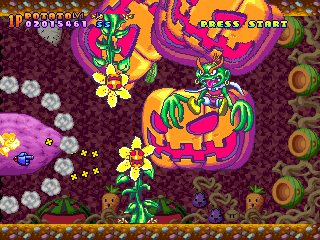
BOSS - Pumpkin Goblin
The stage 2 boss is extremely difficult to score on. He spawns only 6 destructable objects (slowly and gradually), and all of them take more than one bomb to kill - it's very possible to run through the whole fight and have the boss succumb to the bomb before anything else, giving you no multiplier at all.

He will spawn two flowers at the beginning, which will shoot at you throughout the fight. After that, he will throw the pumpkin on his head at you, which will bounce around the room until you kill it. He will throw a total of four pumpkins, all of which can be on screen at once if you leave them alive. The difficulty of avoiding the boss, his flowers, and a large group of giant pumpkins is probably more than it's worth. If you want to get something out of the fight, kill one flower, hit the boss with 13 Lvl. 1 pies, and finish the boss off when there are one or two pumpkins on screen. 150,000 is better than 50,000.

Image

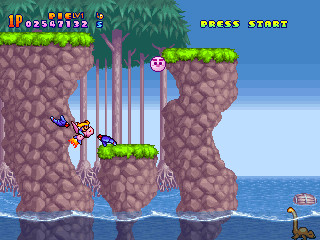
Stage 3: Animal Zone
Stage 3 is a little bland from a design perspective, but there are a lot of opportunities to score here. Many enemies here have a base value of 10,000, and are accompanied by enough small enemies to make throwing a bomb worth your while.

Panda 10,000
Unlike other pandas, Stage 3's bears are worth 10,000 each. The catch - they're both placed so that they'll fall off screen very soon after you hit them. To effectively kill them with a bomb, throw the bomb, and shoot them a few times before it explodes. The explosion should come soon enough to finish them off before they escape.

Ape 10,000
8 pies, hit the first two bulls with a pie and bomb them+the birds to finish the ape???

Alligator 10,000
After the train enters the tunnel, it will be eaten by an alligator. Soften him up with a bit of Potato fire then bomb while the popcorns are still on screen.

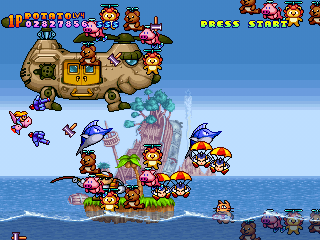
Dogcopter 10,000
It's rarely this easy. Hit him with five Lvl. 1 Pies, then back off for a while. He'll start dropping guys into the sea, but don't strike yet - a group of flying animals comes on screen that will make a x16 easy. Might want to have another bomb or two on hand; a lot of gems will spawn from this along with another set of enemies who will get in the way (and who can be a great source of points/gems as well).

Image

Turtle Island 10,000
At the end of the stage a turtle will appear and spin around the top of the screen before showering everything below him with bullets. He's tough to damage enough to kill at the right time, but he spawns near a few lobsters that spit destructible bubbles that provide a great multiplier.

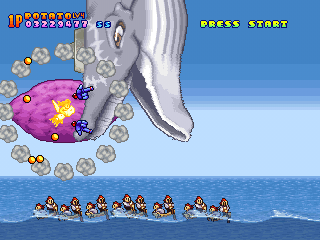
BOSS: Whale
He may look boring, but guy will give your first taste of what bosses can do for you. He starts the fight by spitting a bunch of garbage at you, which is easily avoided by just hiding underneath him. Next, he'll jump in the air, and pause to spit eight small enemies into the water. When he pauses to release the enemies, throw seven Lvl. 1 Pies before he jumps back in the water. Repeat this pattern one more time, for a total of 14 pies thrown. Deal a little bit of extra damage with your Potato gun, but don't go overboard.

The next time he spawns the enemies, throw out a bomb and hope he dies. If it doesn't work the first time, try once more - he will only run through his cycle four times before timing out. If you're able to pull this off, you'll be rewarded with a x9 multiplier for 450,000 points - that's practically an extend!

Image

Stage 4: Coaster World
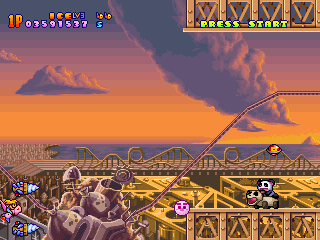
Here we go. It's not hard to pull 3 mil from this stage alone; high-value enemies are plentiful, and in the later half swarms of popcorn enemies will flood the screen with gems if you bomb intelligently. And the boss is the single largest source of points in the game.

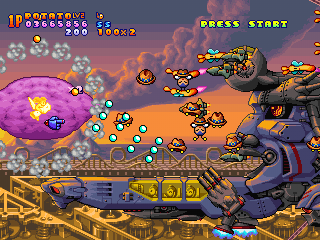
Battleship 20,000
There are four of these guys in the stage. They take 2 Lvl. 1 Pies and a little bit of Ice beam, and a bomb will finish the job. The first two you encounter only show up with 4 or 5 small enemies, but with a base value of 20,000 that's enough.

At the end of the level, two of them appear together. It's harder to weaken them enough to kill with one bomb while not killing them, but there's enough small enemies around to hit x16 on both of them.

Face: 30,000 Body, 5,000 "Hair", Mouth 5,000
Midway through the level, you'll be ambushed by a much larger battleship - with a face. Throw a Pie at its hair, one at his mouth, and nine at his body. Once he flashes red, stop attacking. Some yellow enemies will be flying by, but wait until the ship starts launching missiles to throw out a bomb. This should finish the mouth and maybe his hair with a multiplier around x10 or so; wait for the screen to fill up again and throw another bomb to destroy the body. It's not too tough to get a x16 on this guy, which will earn you an extend and then some with all the other enemies that go down with him.

Image

BOSS Hot Babe maybe
If you thought the stage 3 boss was exciting, get ready for this - the stage 4 boss will give up a x16 quite easily. Hit her with 11 Lvl. 1 Pies. She can take two or three bombs after this, so if you want to conserve your specials weaken her up with some Potato fire. When you're ready, wait for the flowers to come out and throw out a bomb. Between the enemies and the flowers there's more than enough to give you x16 before the boss blows.

Additionally, every time you bomb the storm of flowers, you can score around 45,000 in enemy and gem points. A million points from this boss is simple if you are willing to spend some time and bombs on her. Hit her with 10 pies instead of 11, and bomb every time the flowers come out.

Image

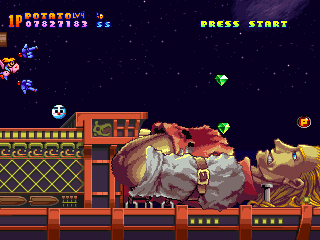
Stage 5: Ray Night Parade
Gorgeous stage. At first look it seems a little sparse on the scoring side, but there are a couple of nice swarms of easy kills, and the second half has a bunch of enemies worth over 10,000.

Horse 20,000
Just before the ship, there's a wooden horse that's being pulled by a small enemy. Be careful not to kill the little guy - if he dies the horse won't move into the right position and you'll limit your scoring potential. Hit it with four Pies (on the body, the head is invincible) and soften it up with a little extra potato fire, then stop. Leave it alive until it's almost off screen - a group of flying animals will spawn when the ship comes into view, bomb them and you can x16 the horse. There's also two cannons worth 10,000 in the same area - try to kill them at the same time.

Image

Cannons 10,000
Cannons begin to show up on the ship; each is worth 10,000 on its own and they're all surrounded by smaller enemies. Throw one Lvl. 1 Pie at them, then wait for the right moment to drop the bomb.

BOSS The King
Like the stage 2 boss, all of the enemies that accompany the king won't succumb immediately to a bomb, so it's very easy to accidentally kill the boss first and get nothing for your efforts.

The king will spawn two archers, and replace them if you kill one. Focus on slamming him with pies, but stop throwing when he starts flashing red. Soften him just a little with your potato gun. Eventually he'll spawn six toy soldiers in the lower right corner - plant a bomb on top of them and they should die before the boss. If you're lucky, you'll kill all the soldiers then the boss, for a x7 multiplier on the boss. (you can try to kill the archers at the same time for x9 - good luck with that) If you're not lucky, the boss will probably just die.

Image

Stage 6: Central Castle
Coming soon! There are plenty of high value enemies in stage 6, but they're generally a little more difficult to take advantage of. Still, I'm sure pulling 2 million out of stage 6 wouldn't be hard with a little discipline.
Restart Syndrome::
Shmup leaderboards and Video Index! | My score history on RS
User avatar
CStarFlare
Posts: 3000
Joined: Tue Feb 19, 2008 4:41 am

Re: ST: Harmful Park

Post by CStarFlare »

Snowman Locations

This is a list of all the Snowmen I've found so far.

Stage 1
Image

Stage 2
Image Image

Stage 3
Image

Stage 4
Image

Stage 5
Image

Stage 6
Image Image Image
Restart Syndrome::
Shmup leaderboards and Video Index! | My score history on RS
User avatar
Nifty
Posts: 571
Joined: Sat Aug 15, 2009 2:31 am
Location: 'Strailya

Re: ST: Harmful Park

Post by Nifty »

Awesome :D I intend to put a score together for this at some point, maybe on Hard.

Does Pie damage scale up with level too, or just firing rate? Also I find Jerry sometimes useful for hitting targets behind walls, although the Ice laser can suffice too due to the trick that lets it be moved 'through' a wall.
Live to fly, fly to live, it's all very orthodox
User avatar
CStarFlare
Posts: 3000
Joined: Tue Feb 19, 2008 4:41 am

Re: ST: Harmful Park

Post by CStarFlare »

Pie damage does seem to scale; the large ghosts in stage 2 will die with 3 level 2 Pies and a bomb, but won't die with 3 level 1 Pies and a bomb. This is why I generally keep it at level 1, I've done all my damage counts with level 1 Pies so counting off damage with level 2+ wouldn't be accurate.
Restart Syndrome::
Shmup leaderboards and Video Index! | My score history on RS
Post Reply