NESRGB board available now
Re: NESRGB board available now
Is jumping the 220uf caps necessary though? I never did that on mine and my cable with the 220uf caps inside still works fine.

Re: NESRGB board available now
By not doing so you halved the capacitance since you have 2x 220uF's in series and end up with a total of 110uF.
-
Emperor Udan

- Posts: 30
- Joined: Tue Jul 21, 2009 9:38 pm
Re: NESRGB board available now
I understand the doubling of caps but I don't understand why Tim say that you can either use Pal GC cable (with 220µ caps), NTSC Snes cable (with 220µ caps) or a Pal Snes cable with caps removed?

Sorry for my bad english, Frenchy here.

Re: NESRGB board available now
No, it's not necessary to remove the 220uF caps on the NES RGB when the cable is wired like a DOL-013 (GC SCART) or SHVC-010 (SFC RGB21). Tim himself stated that it's fine to use a cable with 220uF caps. From the electrical standpoint, it's better to have them on the source than at the destination cable plug. But I can also see people complaining about having more than one SNES RGB cable (with and without caps)...kamiboy wrote:Is jumping the 220uf caps necessary though? I never did that on mine and my cable with the 220uf caps inside still works fine.
Here are some quotes for reference:
viletim wrote:You can just use it as-is. I don't think the extra capacitors in the cable will cause any problem.juji82 wrote:If I get an AV Famicom and mod it, Can I use this cable or I will need to mod it? It is the official RGB Gamecube Cable from Nintendo.
viletim wrote:Yes, I understand. It's probably best to buy a Nintendo RGB cable of some variety, remove any capacitors/resistors, and dedicate it to the AV famicom.mufunyo wrote:Also, if you could sell the charge pump PCB separately, Famicom AV users could use it to convert their multi-AV-connector J-RGB21 cables into euro SCART cables (pin 10 on the multi-AV is +5V that maps to pin 11 on the RGB21 cable). I know you recommend your DIN solution, but don't underestimate people's desires to keep their Famicom AV shell stock.
viletim wrote:Regarding AV Famicom RGB cable compatibility: You can use the Japanese RGB-21 cable if you bypass the output capacitors on the NESRGB board. It is impossible to use the official SCART cable unless you modify it (remove the resistors).
Re: NESRGB board available now
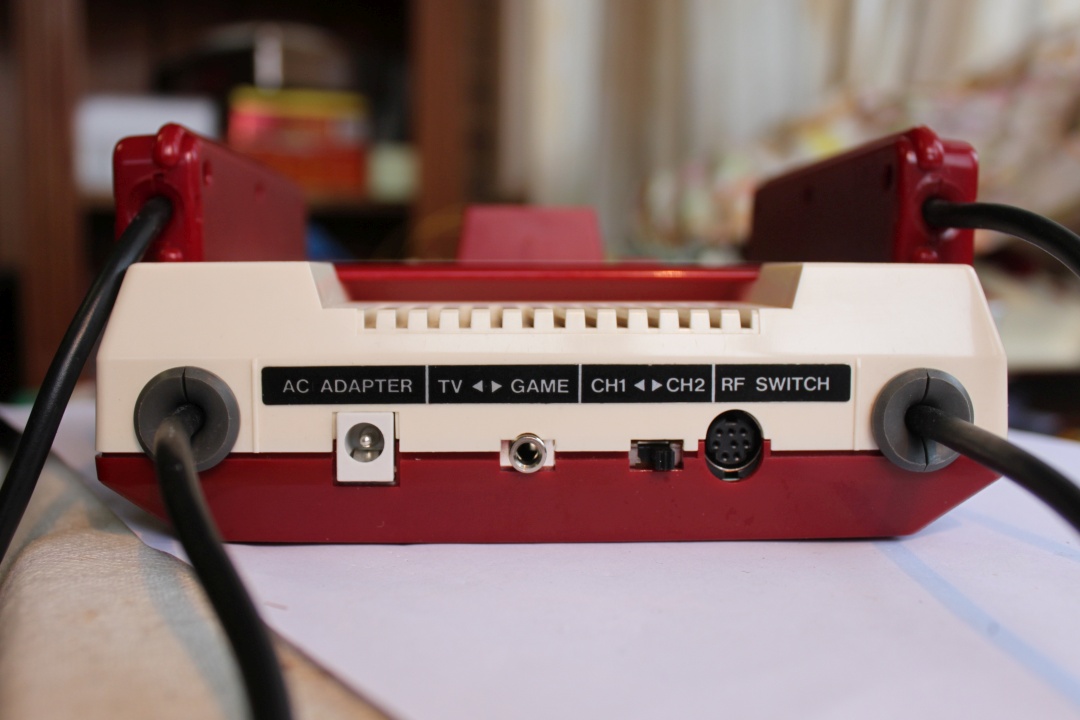
PAL SNES RGB SCART cable is wired like this:Emperor Udan wrote:I understand the doubling of caps but I don't understand why Tim say that you can either use Pal GC cable (with 220µ caps), NTSC Snes cable (with 220µ caps) or a Pal Snes cable with caps removed?

The 75 ohm resistors would need to be removed for the cable to work correctly with the NESRGB.

Notice the difference?
-
Emperor Udan
- Posts: 30
- Joined: Tue Jul 21, 2009 9:38 pm
Re: NESRGB board available now
Yes maybe I'm confused between capacitor and resistor as I'm a noob in electronic.
If I understand well Tim words, if I pick pal SNES cable, just have to remove every 75ohm resistors, pal GC cable: remove every 220 caps.
Thanks.
If I understand well Tim words, if I pick pal SNES cable, just have to remove every 75ohm resistors, pal GC cable: remove every 220 caps.
Thanks.
Sorry for my bad english, Frenchy here.
Re: NESRGB board available now
I go by the if it aint broke rule in these sort of situations.Pasky wrote:By not doing so you halved the capacitance since you have 2x 220uF's in series and end up with a total of 110uF.
Re: NESRGB board available now
I don't care what you go by, I was just answering your question. You're essentially changing the cut off frequency because those caps are just high pass filters on the color lines (and also to block out DC voltage since DC voltage is blocked by a capacitor). It'll all depend on how sensitive your device is. Capture cards will sometimes be real finnicky if you use a low value capacitor value (such as 47uF) and you'll notice flickering and other anomalies. CRT's generally don't care and will accept just about anything.kamiboy wrote:I go by the if it aint broke rule in these sort of situations.Pasky wrote:By not doing so you halved the capacitance since you have 2x 220uF's in series and end up with a total of 110uF.
Re: NESRGB board available now
My mistake in making my statement look like a question, I actually do not care what two caps in series does as long as it works.
Re: NESRGB board available now
"It works" is relative to today. Are you hooking it to rgb crt? Who cares.. But in the future, will you try to feed xrgb? New rgb monitor that is more sensitive? Video capture card?kamiboy wrote:My mistake in making my statement look like a question, I actually do not care what two caps in series does as long as it works.
If it works.. Excellent. I prefer to make sure it just works now, future and every person I might sell to in the future without the need to modify it.
Re: NESRGB board available now
I am a strictly CRT only guy, none of my displays are fussy and my capture device of choice is a phone camera. Of course if you have customers to worry about you need to start thinking more broadly.
-
Emperor Udan
- Posts: 30
- Joined: Tue Jul 21, 2009 9:38 pm
Re: NESRGB board available now
Epic fail night, need a little help.
I ordered two kit, one for AV Famicom and one for Pal toaster.
I received one kit so I begun installing NESRGB in my pal toaster.
After almost completing everything, I realized I received AV Famicom kit, not toaster kit, I was lacking the voltage regulator.
Because of progression made so far on my toaster, I kept going.
I picked a voltage regulator on a spare dead Pal snes.
I tested it, picking voltage on unregulated input Vin and Ground, It threw me clean 5V.
Testing the Nes, picture was perfectly pixel square but there was glitch everywhere around some sprites.
Checked cartridge pin, Nes cartridge input pins, everything was perfect.
Games were running flawlessly before modding.
Retested voltage regulator, shorts checking everywhere, PPU solder, everything was nice.
I think the problem was my soldering iron and desolder process.
I desoldered PPU seriously heating things and using desoldering braid.
Do you think it can came from here?
Since this, I completed my night ruining everything left.
Supposing it may came from unofficial voltage regulator, I tried not using it, knowing it will overheat the one on Nes.
I said to myself I will just test few seconds.
Result, black picture, no sound.
Re-install my voltage regulator... no picture no sound. (/facepalm)
I have a spare Pal Nes perfectly working but I'm in front of questions before modding it.
Do you think all came from maybe dead PPU?
Do you think I break something on NESRGB board not using voltage regulator, so I can use it again?
(I bought a brand new soldering iron and desoldering pump)
Sorry for my bad english, Frenchy here.
-
Necronopticous

- Posts: 2126
- Joined: Sat Sep 29, 2007 8:50 pm
- Location: Baltimore
Re: NESRGB board available now
This year, I give thanks to the marriage of RGB & 900 line resolution CRT monitors.


Re: NESRGB board available now
Necro, those pics are amazing. Is that the nesrgb board on a bvm-20f1u?
-
Necronopticous
- Posts: 2126
- Joined: Sat Sep 29, 2007 8:50 pm
- Location: Baltimore
Re: NESRGB board available now
Indeed! A friend of mine just finished the NESRGB installation for me last night. So stoked!
-
TheRetromancer
- Posts: 116
- Joined: Fri Feb 07, 2014 9:27 pm
Re: NESRGB board available now
Quick lesson: Resistors attenuate, or cause a drop in the strength of, the signal they are fed(let's not get into pull-up resistors, everybody, let's just keep it simple). The most simple and easy to understand example is if you take the Luma(Brightness) aspect of a video signal and slap on a resistor, the image will become darker proportionally to the strength of the resistance.Emperor Udan wrote:Yes maybe I'm confused between capacitor and resistor as I'm a noob in electronic.
If I understand well Tim words, if I pick pal SNES cable, just have to remove every 75ohm resistors, pal GC cable: remove every 220 caps.
Thanks.
Capacitors are essentially little batteries - they store a charge and release it very quickly. How they are used in a circuit, though, can have a tremendous effect on how they affect the output, but they are commonly used to 'smooth out' the peaks and valleys of voltage.
Last edited by TheRetromancer on Wed Nov 26, 2014 4:51 am, edited 1 time in total.
"Thanks for the nice reply. I do offer to do work without hot glue too if people prefer it that way." - Drakon
-
Emperor Udan
- Posts: 30
- Joined: Tue Jul 21, 2009 9:38 pm
Re: NESRGB board available now
Thanks RetroMancer.
Success at last.
I tried on another Pal Nes and here we are: youtube video
I think I burned PPU in my previous attempt with my old soldering iron.
New Iron and desolder pump is salvation. ^^
And with native scart from French Nes, I used original video port and scart cable, less work to do: picture
Next move, desolder burned PPU from first NESRGB kit and try this kit in AV Famicom.
Thank you so much Tim.
Sorry for my bad english, Frenchy here.
Re: NESRGB board available now
be very careful when removing the ppu from the nesrgb. the through-holes are a lot more fragile on it than they are on the nes pcb.
the nespcb you can really pull on the ppu a lot before the traces will lift.
On my seventh nesrgb, I accidentally soldered one of the pin headers in the wrong holes and i found out for myself how easy the traces will pull out.
I could have lost the board but thankfully i was able to repair the damage.
this was the first nesrgb ive made a big mistake on.
-
burgerkingdiamond

- Posts: 1571
- Joined: Wed Oct 06, 2010 9:56 pm
- Location: Virginia, USA
Re: NESRGB board available now
Fuck yes! Just finished installing on my front loader and it worked right away. I was totally expecting to spend at least an hour or two troubleshooting bad solder joints.. Anyway, castlevania III is looking amazing on my pvm 2030. This is a kick ass product.
Let's Ass Kick Together!
1CCs : Donpachi (PCB - 1st loop) Dodonpachi (PCB - 1st loop) Battle Bakraid (PCB) Armed Police Batrider (PCB) Mushihimesama Futari 1.5 (360 - Original) Mushihimesama Futari BL (PCB - Original)
1CCs : Donpachi (PCB - 1st loop) Dodonpachi (PCB - 1st loop) Battle Bakraid (PCB) Armed Police Batrider (PCB) Mushihimesama Futari 1.5 (360 - Original) Mushihimesama Futari BL (PCB - Original)
-
TheRetromancer
- Posts: 116
- Joined: Fri Feb 07, 2014 9:27 pm
Re: NESRGB board available now
Tim does good work, and, personally speaking, he is a stand-up guy who has always gone the extra mile for me when I had problems with a few of the things I've ordered. Super nice guy - just a real gentleman in the finest sense of the word.burgerkingdiamond wrote:Fuck yes! Just finished installing on my front loader and it worked right away. I was totally expecting to spend at least an hour or two troubleshooting bad solder joints.. Anyway, castlevania III is looking amazing on my pvm 2030. This is a kick ass product.
"Thanks for the nice reply. I do offer to do work without hot glue too if people prefer it that way." - Drakon
Re: NESRGB board available now
Solution for original FAMICOM now available!!!
http://etim.net.au/nesrgb/installation-famicom/
Seems a tad expensive?
http://etim.net.au/nesrgb/installation-famicom/
Seems a tad expensive?
Re: NESRGB board available now
Hoping to order this soon from the US distributor. My only issue will be the inability to use the eject lever - I know it isn't needed, but I would like to still use it.
I think I will do a hybrid installation by making use of the new power board, but installing the actual NESRGB board and having the PPU interface w/ wires by following the old installation instructions.
I do not use or own an Everdrive so I don't think the issues people were having by using wires between the PPU and NESRGB will be an issue for me... Hopefully.
Re: NESRGB board available now
I'm a tad disappointed by the solution Tim suggested to follow for the Famicom. It's a total different direction from any other 8 bit Nintendo system:
- Svideo or RGB output - not both
- forces users to use his 8 pin DIN (can't use 3D printed multiAV port)
- why adding Everdrive audio support? What about NES RetroPak? Why even add it at all?
- why add stereo support?
- removal of famicom eject button
I think if someone really wants famicom .. famicom AV might be the only solution.

Re: NESRGB board available now
You don't have to use it if you don't want to, there should be just enough room inside the Famicom to mount one of those 3D-printed multiouts. Also, $35AU isn't too bad considering what you get with the kit; you not only get the adapter board but another board that entirely replaces the original power/AV PCB, with parts even.leonk wrote:forces users to use his 8 pin DIN (can't use 3D printed multiAV port)

Re: NESRGB board available now
Aside from the fact I'll never understand the infatuation with the large and ugly multiAV portleonk wrote:forces users to use his 8 pin DIN (can't use 3D printed multiAV port)
-
bobrocks95

- Posts: 3473
- Joined: Mon Apr 30, 2012 2:27 am
- Location: Kentucky
Re: NESRGB board available now
It looks like the Everdrive and stereo sound support are optional additions. I'll certainly be leaving them out to avoid drilling holes in the bottom of my Famicom shell.
The only thing that bothers me is the removal of the eject mechanism. I'll be waiting to read from any users that choose to do a hybrid install that keeps that functional.
The only thing that bothers me is the removal of the eject mechanism. I'll be waiting to read from any users that choose to do a hybrid install that keeps that functional.
PS1 Disc-Based Game ID BIOS patch for MemCard Pro and SD2PSX automatic VMC switching.

Re: NESRGB board available now
I think this is a nice solution. Personally I don't mind removing the eject mechanism, as it requires less effort to just pull out the carts and using it tends to leave marks on them.
You don't need to drill holes for Everdrive boost, the channel switch handles that. The holes are for stereo adjustment and palette switching (the latter can be done with controller 1).
You don't need to drill holes for Everdrive boost, the channel switch handles that. The holes are for stereo adjustment and palette switching (the latter can be done with controller 1).
-
bobrocks95
- Posts: 3473
- Joined: Mon Apr 30, 2012 2:27 am
- Location: Kentucky
Re: NESRGB board available now
Knew I'd flipped that around with something. Then the question is, can you repurpose the channel switch? Changing palettes on the controller sounds cool, but I won't ever be using the Everdrive (hyuck).yxkalle wrote:You don't need to drill holes for Everdrive boost, the channel switch handles that. The holes are for stereo adjustment and palette switching (the latter can be done with controller 1).
PS1 Disc-Based Game ID BIOS patch for MemCard Pro and SD2PSX automatic VMC switching.
Re: NESRGB board available now
There's noting to stop you from attaching additional connectors to the case.leonk wrote:I'm a tad disappointed by the solution Tim suggested to follow for the Famicom. It's a total different direction from any other 8 bit Nintendo system:
- Svideo or RGB output - not both
It fits with no case modification, is cheap, and I can supply cables.leonk wrote: - forces users to use his 8 pin DIN (can't use 3D printed multiAV port)
The Nintendo AV port on the other had requires extensive case modification, is unobtainable (3d printing connectors is not economically viable), and I cannot supply cables.
Again, there's nothing to stop you from fitting one if you're willing to carve up the shell.
The Famicom version of the NESRGB kit replaces the original audio mixing circuit. Some of my customers use the Everdrive and would like to hear the expansion audio sound as it was intended.leonk wrote: - why adding Everdrive audio support? What about NES RetroPak? Why even add it at all?
What's a NES RetroPak?
It was requested. Some people like it. If you turn the stereo width control all the way down the audio will become mono.leonk wrote: - why add stereo support?
This is unfortunate, but there's way to keep it and make the installation easy and reliable. The eject mech doesn't work all that well (compared to other consoles with this feature) so I don't think anybody will miss it too much.leonk wrote: - removal of famicom eject button
There's no need to drill holes in the base the of console if you don't want to. I'll should probably make this more clear in the guide.bobrocks95 wrote:It looks like the Everdrive and stereo sound support are optional additions. I'll certainly be leaving them out to avoid drilling holes in the bottom of my Famicom shell.
Repurpose...for what other purpose?bobrocks95 wrote:Knew I'd flipped that around with something. Then the question is, can you repurpose the channel switch? Changing palettes on the controller sounds cool, but I won't ever be using the Everdrive (hyuck).
Re: NESRGB board available now
Pretty sure he meant NES Powerpak not retropak. There is also an expansion audio mod to get expansion audio with it:
http://forums.nesdev.com/viewtopic.php?t=7880
http://forums.nesdev.com/viewtopic.php?t=7880